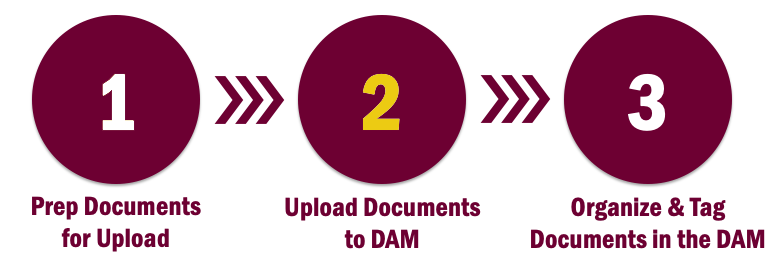
Loading Documents to DAM
All documents to be used on your website
should be optimized and uploaded to your unit's designated document library within Sitefinity, a.k.a. the DAM (digital asset manager). Please only upload PDF files (no Word docs, PowerPoints, etc.). Also, please do not create new, top-level document
libraries. You can, however, create sub-libraries to better organize the documents within your unit's designated library. The maximum number of files per library is 100.
Instructions
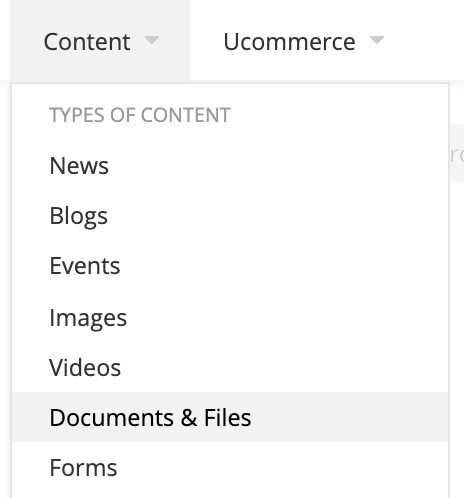
1. Click Content in the top navigation and select Documents & Files.

3. Click Upload documents.
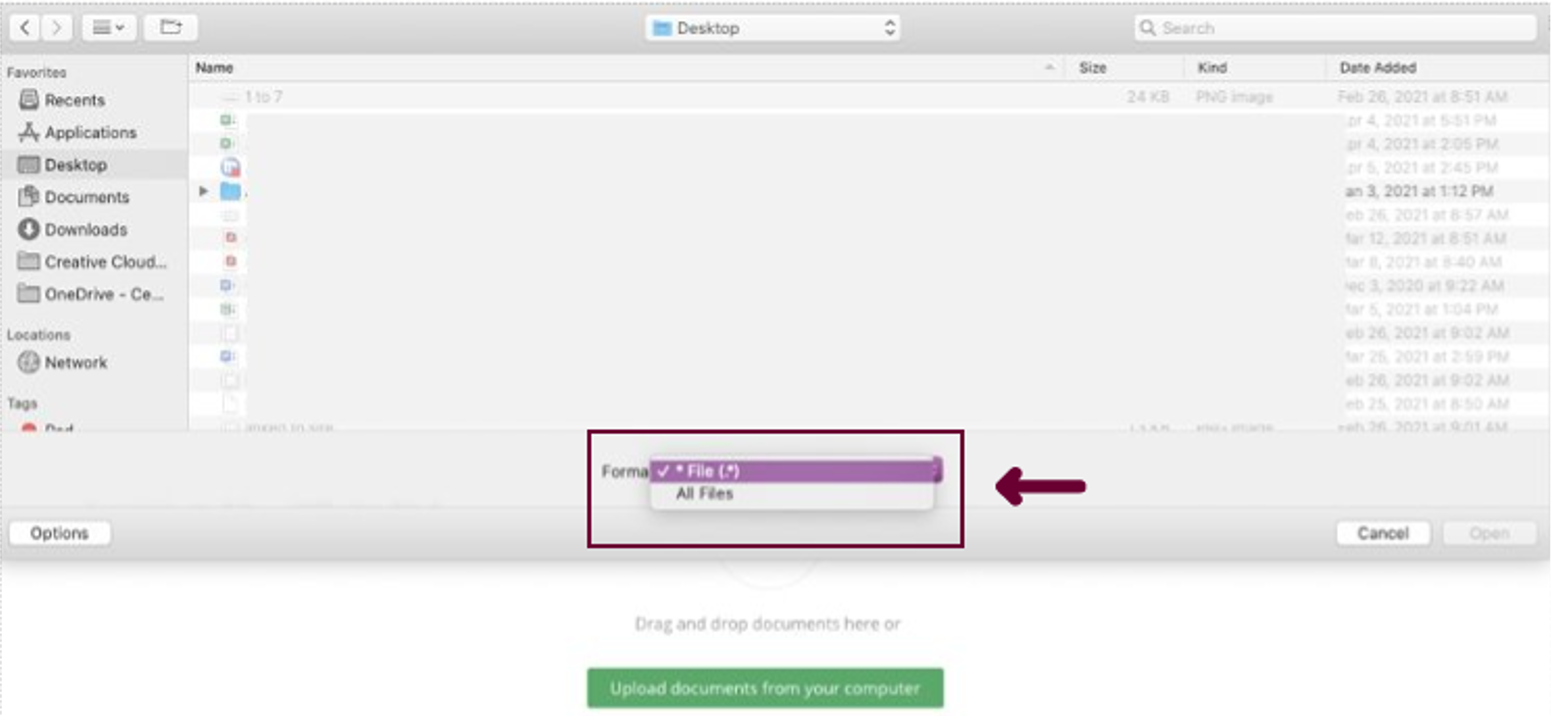
4. Select a document from your computer.
- You can drag and drop your file to upload it or select it from a location on your computer.
- If you don't see your document in the file listing,
- Select Options in the lower left corner
- Change the drop down to "All Files"
- Find the file you want to upload, select it and upload it.
- If you don't see your document in the file listing,

5. Once the file has been uploaded into Sitefinity, check that it is in the correct folder and then click Save as Draft.
- By saving the file as a draft, you will be able to go edit the document properties before sending it for approval.

6. From the main folder, click on the name of the document you just uploaded.

7. Once uploaded, fill in the document properties including the Author, Description, Tag and Category information.

