Replacing documents within the DAM
Updating the content of a document stored in the Digital Asset Management (DAM) can be accomplished in a few steps. There is a setting in the document properties that lets you replace the document in the DAM and then the document will automatically be updated on all web pages that include the document. This saves you time by making the edit once on the document and Sitefinity auto-replacing the document anywhere it is linked on the website.
Capabilities
- Edit and update document(s) in the DAM.
- Automatic replacement of edited/updated document(s) anywhere it is linked on the website.
- Save time making edits/updates to documents stored in the DAM.
Guidelines
- All documents uploaded to the DAM should be 5MB or less.
- Optimize (compress file size) document(s) before replacing in the DAM.
- Keep file naming and library structure/organization when editing/updating document(s) in the DAM.
Instructions
1. Locate the original document/file on your computer.
a. Make the necessary edits to the document.
b. Save the document as a PDF file on your computer.
c. Save the document using the same file name that was originally uploaded to Sitefinity Digital Asset Management (DAM).
2. In this step you will use Adobe Acrobat to reduce the document file size.
a. Open acrobat.adobe.com.
b. Click on the blue button, Continue with Adobe, to log in using your CMU Global ID.
c. Locate the Convert tab, from the drop-down click on Reduce File Size, Select the Compress PDF option, click Select Files and choose the document file you just downloaded.
d. In the "set compression level" area, select medium compression. Your file will reappear after Adobe compresses it. Save the file.
e. Click on the actions ellipses (three vertical dots) and click Download. You may notice the file name includes - compressed.pdf.

In the next steps, you will replace the outdated document in the DAM with the updated/edited document you edited/saved in steps 1-2.
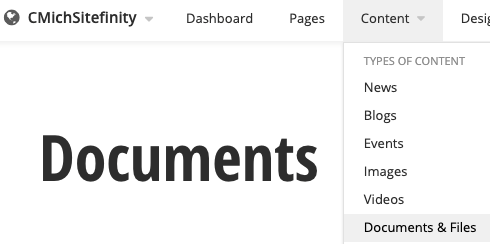
3. From the main Sitefinity menu, click on the Content tab.
a. Click on Documents and Files to open the DAM.
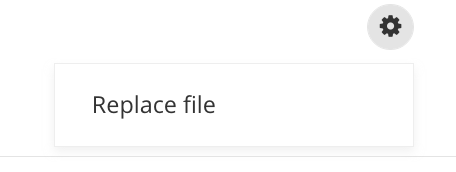
b. Locate the folder that contains the document you need to replace in the DAM.
c. Click on the document to open the properties.
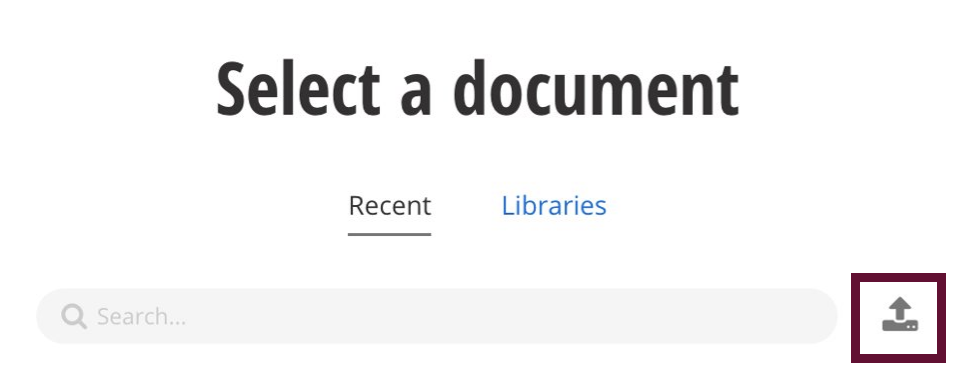
6. After the file is uploaded, click the button "send for approval".
a. Once your document is approved and published, it will automatically update all web pages that have a link to the document.
