Inserting Links
Add links to the Content Block widget to help guide your audience to more about a subject or to take an action.
Widget standards
Do:
- Use text that hints at what the user can expect to find after following the link.
- Open linked documents, pdfs, workbooks and non-cmich.edu pages in a new tab.
Do NOT:
- Use "Click here" as the language for your link.
Using the link button
Visual demo
Written instructions
1. Open the page where you'll be working.
2. Click "Edit" on the Content Block Widget.

3. Highlight the text you want to hyperlink.

4. Click on the link button.

5. Click the "Link to..." field and add in the URL you want to link to. You can also click on "Select page or content" to link to a page, document, news, events or programs.

Tip! If you are adding a link to a website outside of CMU or a document, check the "Open this link in a new window" box.
6. Click "Insert link" once you've entered your information.

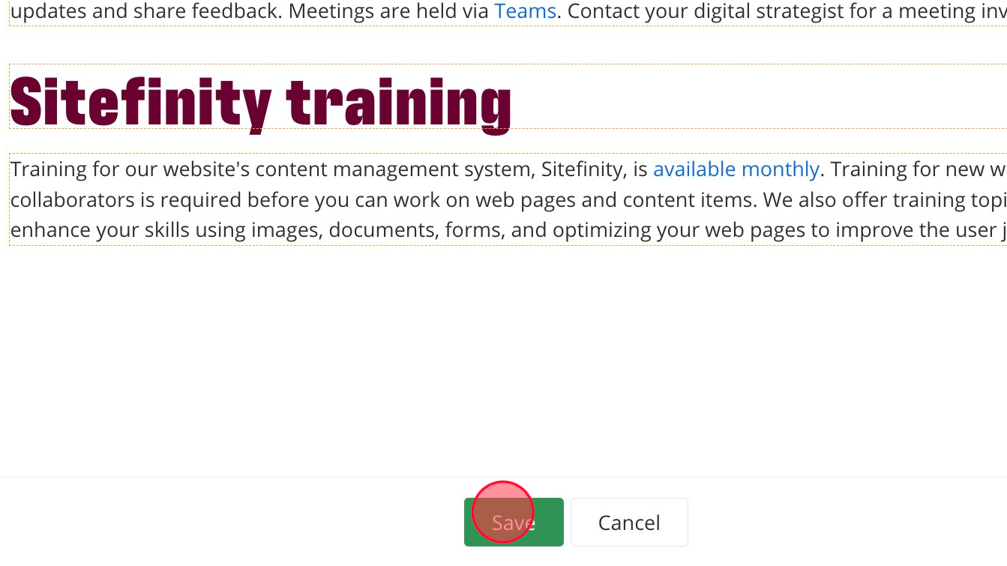
7. Click "Save."
Inserting a button
Visual demo
Written instructions
1. Open the page you'll be editing.
2. Click "Edit" on the Content Block Widget.

3. Start a new line.

4. Click on the button button in the toolbar.

5. Select what color you want the button to be under "Button type."

6. Add the URL of your link into the "Button URL" field.

7. Type your call to action in the "Button Label Text" field.

8. Enter the alternative text for your button into the "Button ADA label" field.

9. Click "Insert."

10. Click "Save."

Speedbump instructions
Visual demo
Written instructions
1. Open the page you'll be editing.
2. Click "Edit" on the Content Block Widget.

3. Highlight the text you want to add a speedbump to.
4. Click on the Speedbump icon in the toolbar.

5. Fill in the LinkURL field.

6. Fill in the LinkText field with the text you want hyperlinked.

7. Add the alternative text to the Link Ada Title field.

8. Click "Insert."

9. Click "Save."

Linking to documents
Documents should be optimized and uploaded to a designated folder within your Sitefinity document library in the DAM prior to building pages. These should open in a new tab for best user experience.
Visual demo
Written instructions
1. Open the page you'll be editing.
2. Click "Edit" on the Content Block Widget.

3. Highlight the text you want to hyperlink to a document.

4. Click on the link icon in the toolbar.

5. Click "Select page or content."

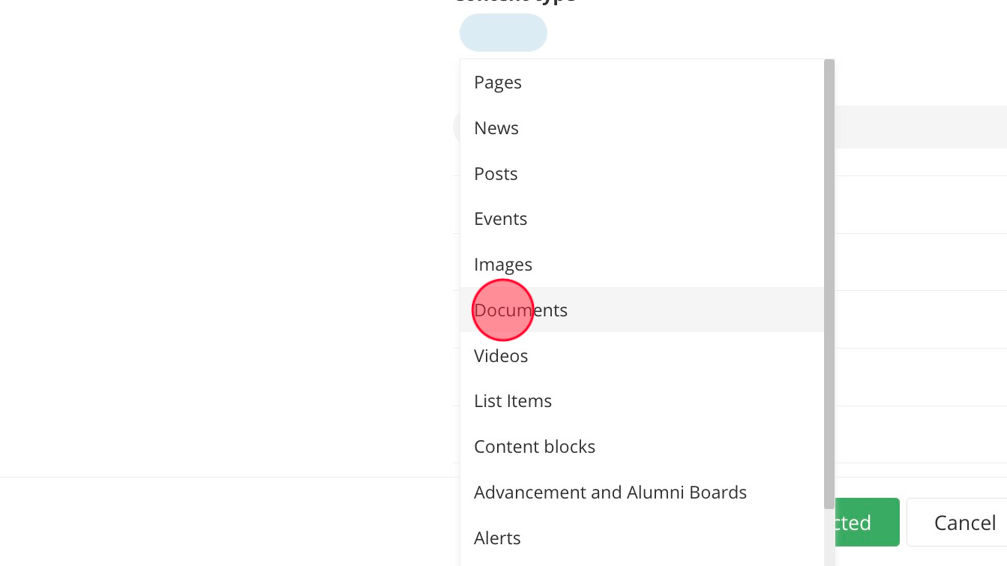
6. Click on the pencil icon next to "Content type."

7. Click "Documents."
8. Navigate through the folders in the DAM, find the document you want to link to, and select it.

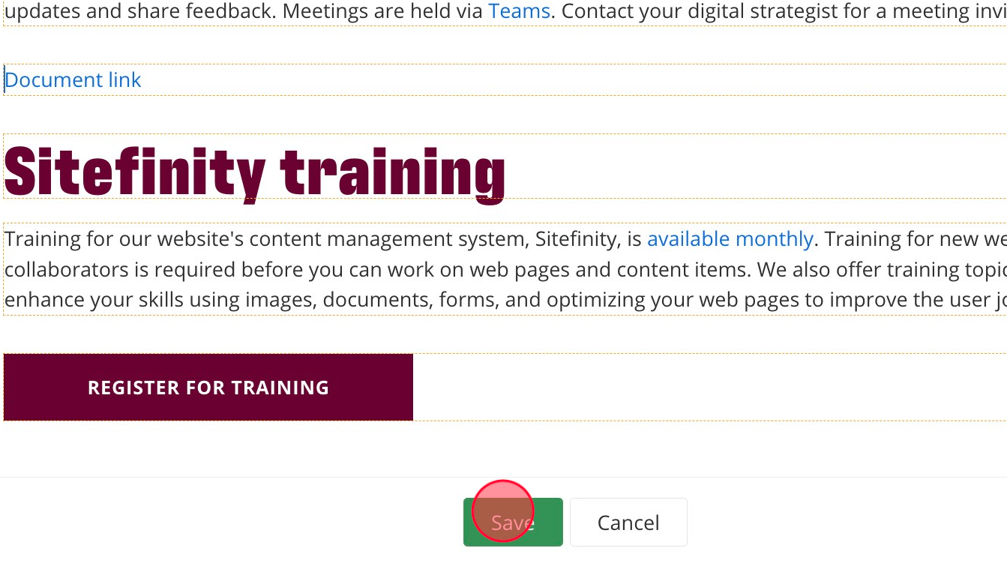
9. Click "Use selected."

10. Check the box next to "Open this link in a new window."

11. Click "Insert link."

12. Click "Save."
Linking to a program
Visual demo
Written instructions
1. Open the page you'll be editing.
2. Click "Edit" on the Content Block Widget.

3. Highlight the text you want to hyperlink to a program page.

4. Click on the link icon in the toolbar.

5. Click "Select page or content."

6. Click on the pencil icon under "Content type."

7. Click "Programs."

8. Find the program you want to link to and select it.

9. Click "Use selected."
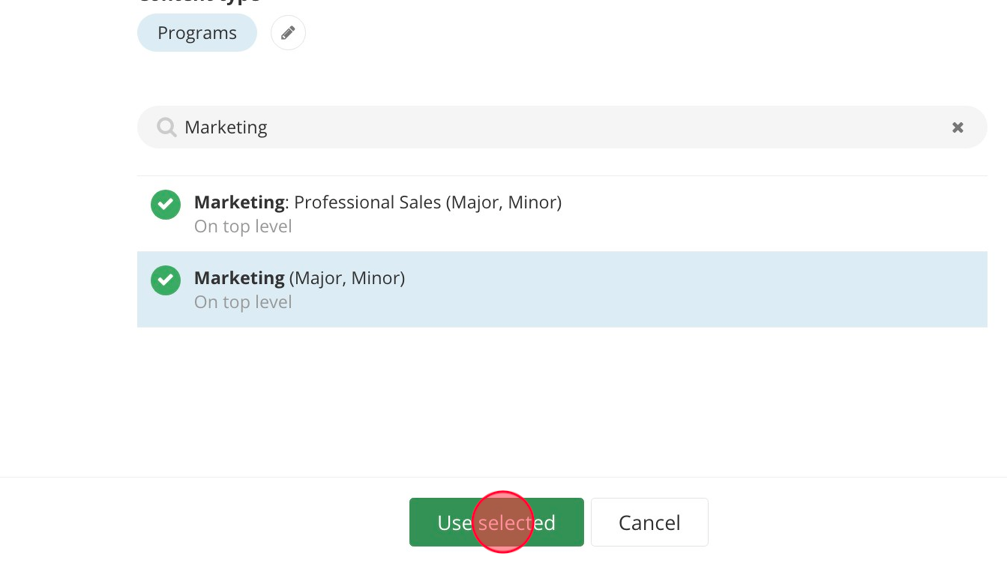
10. Click "Insert link."

11. Click "Save."

WCAG (Web Content Accessibility Guide) compliance
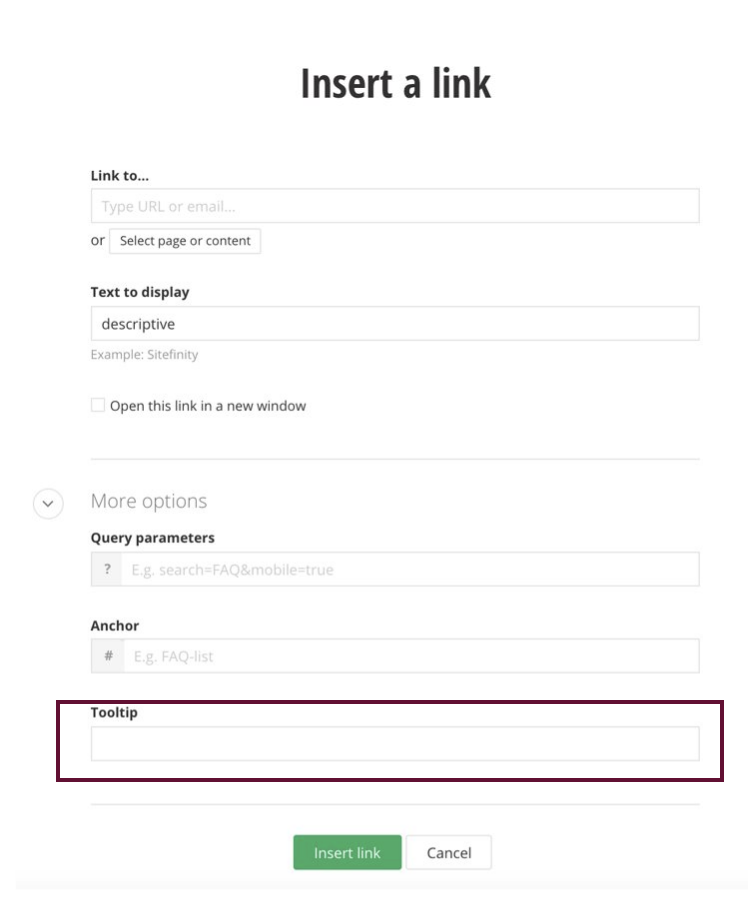
- For WCAG (Web Content Accessibility Guide) compliance, links entered in content blocks must be descriptive.
- Use the Tooltip text field in the More Options section to describe the link. This text will show when a user hovers their mouse over the link text.
- For example: If the link says "Learn more" --> Tooltip should say something like "Learn more about CMU graduate programs."
Save and send
- If you'd like to continue working on this page, but need to save your progress, click Save as Draft.
- If you're finished making changes to the page, and the page is ready for review, click Send for Approval.
