Quick Links Hero
For use with Hero layout on college department and home page templates.
The quick links hero provides a full-width hero image with six quick links underneath it. This widget combines the hero widget and the quick links widget.
Quick Links Hero example
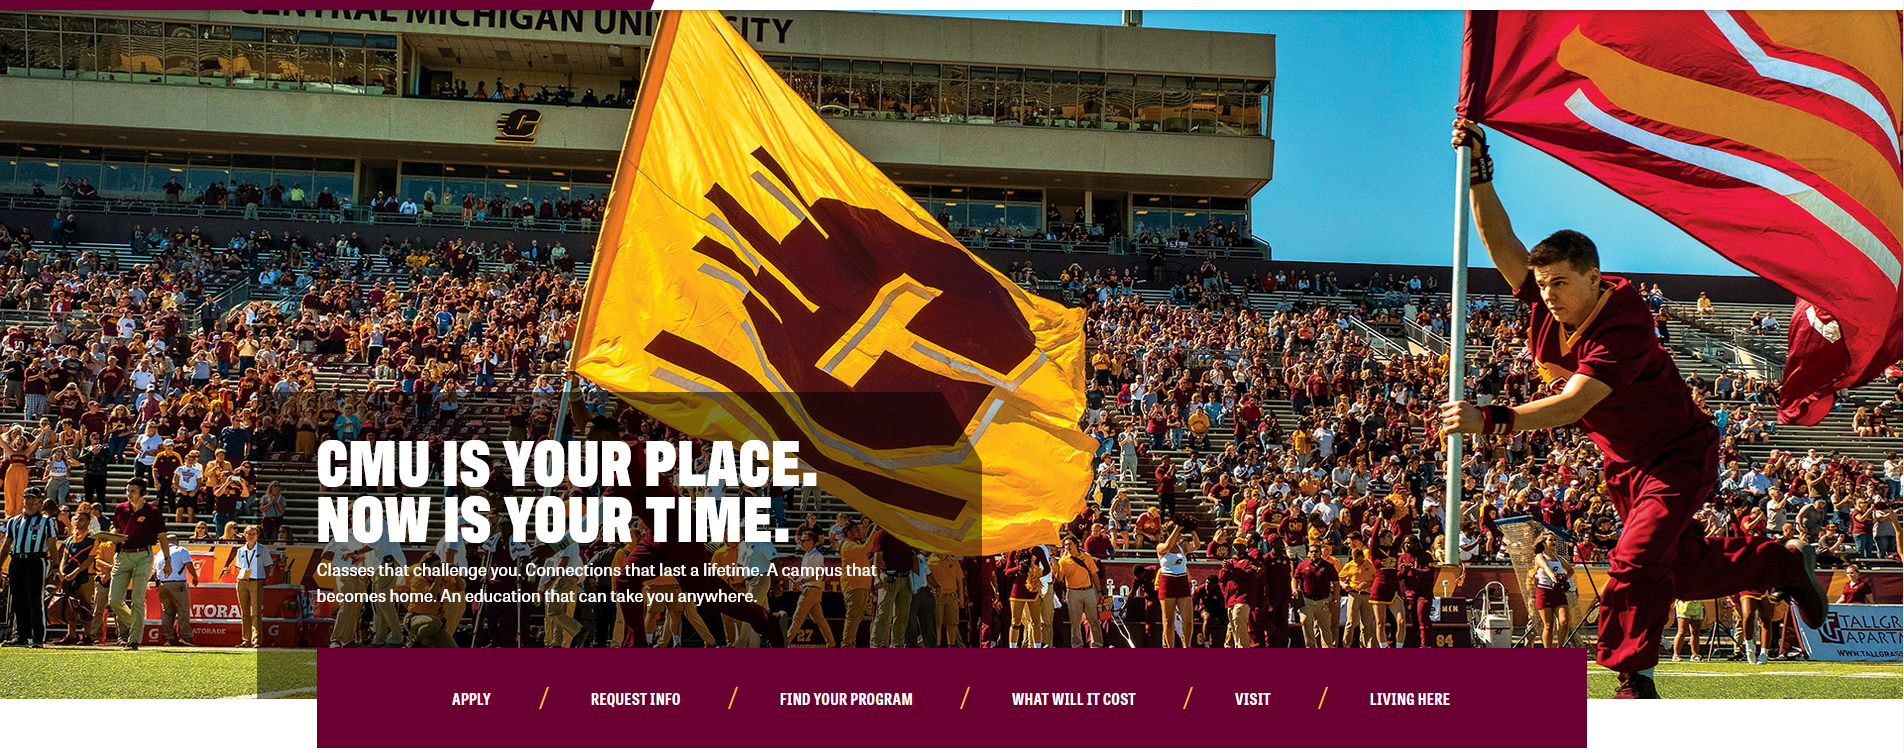
Visual demo
Widget standards
A layout is needed for this widget.
Do:
- Links should be internal to CMU pages.
- No more than six links to be listed.
Do NOT:
- Use in areas other than the designated layouts on the page.
Written instructions
1. Open the page you'll be editing.
2. Locate the Hero widget and drag and drop it into its layout section.

3. Click "Create content."

4. Make sure Template is set to HomePage.

5. Add the page title to the "Heading" field.

6. Add a brief description to the "Description" field. No more than 50 characters.

7. If you want to add a video to your hero, follow the video hero instructions.

8. Add your hero image by clicking on Select image, locating it in the DAM and using the selection. Hero images must be 1800 pixels by 540 pixels.

9. Add the mobile featured image from the DAM by clicking on Select image. This image must be 420 pixels by 560 pixels.

10. Next, you'll add the QuickLink widget to your page. Find it in the widget menu and drag and drop it into its layout under the hero image.

11. Click "Create content."

12. Make sure Template is set to Card.

13. Add the text, or call to action for your first link into the "Link Text" field.

14. Under Link Target, use Same Window if the link is related to CMU, and New Window if it is an external link.

15. Add the alternative text for the link to the "Link ADA Title" field.

16. To add a link from a page in cmich.edu, use the "Page within the site option."

17. To link to an external webpage, select the URL option and paste in the website's address.

18. Click "Save" once you've added your link.

19. For each additional quick link, you'll repeat steps 10-18.
Save and send
- If you'd like to continue working on this page, but need to save your progress, click Save as Draft.
- If you're finished making changes to the page, and the page is ready for review, click Send for Approval.
