How to resize images
In order to maintain your page load speed, provide a good user experience, and correctly build widgets, you'll need to resize images.
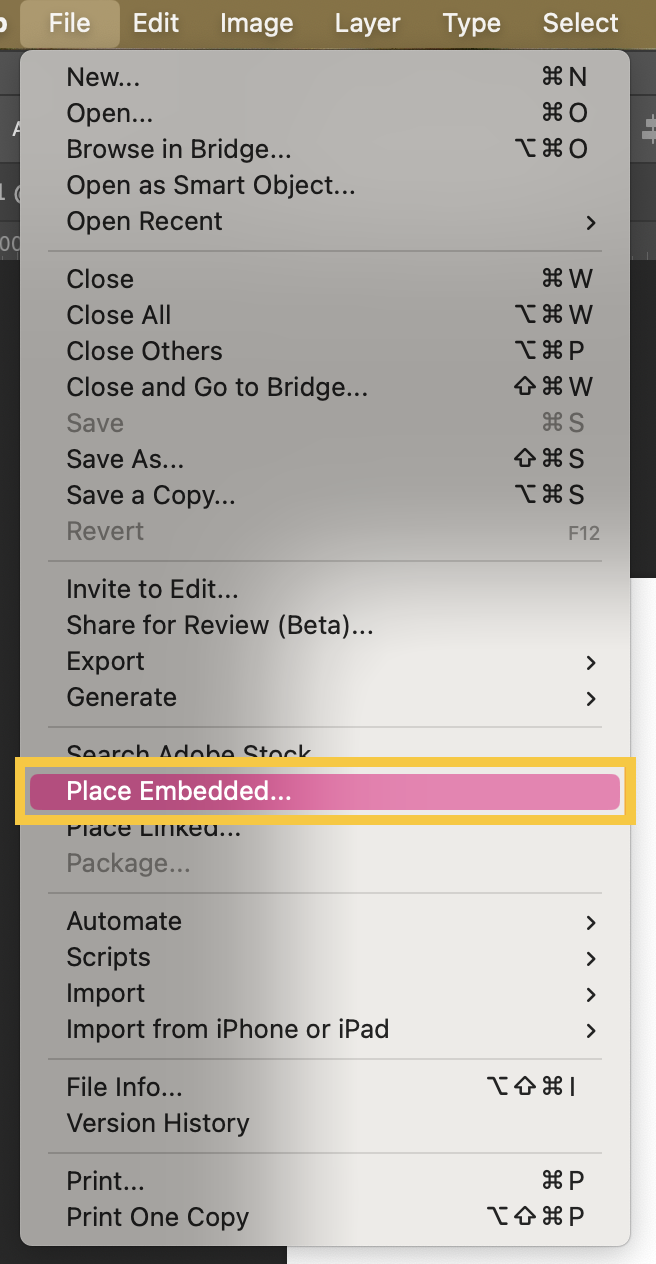
Instructions
1. Open Adobe Photoshop.
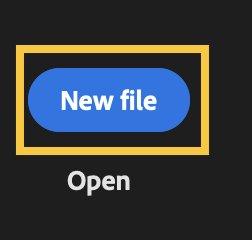
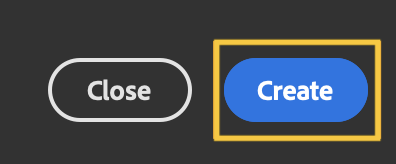
2. Click New file.
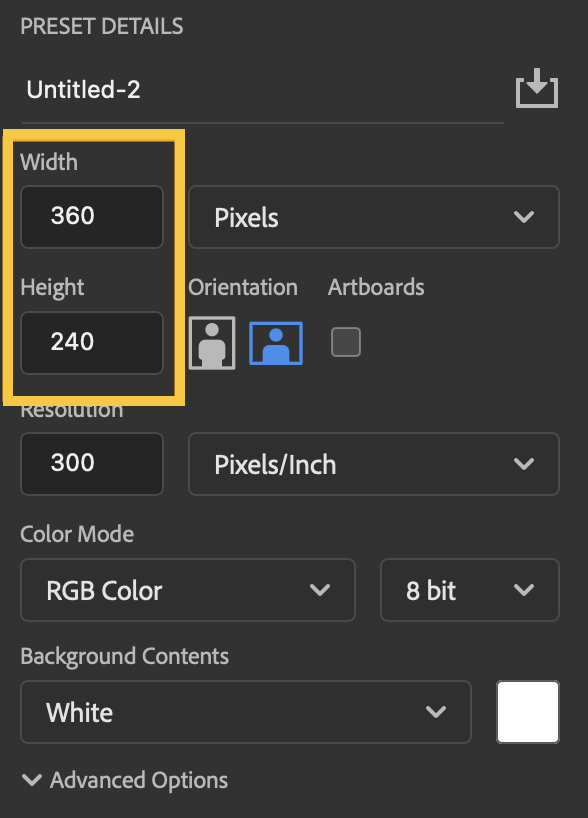
3. Enter your dimensions in the appropriate fields.
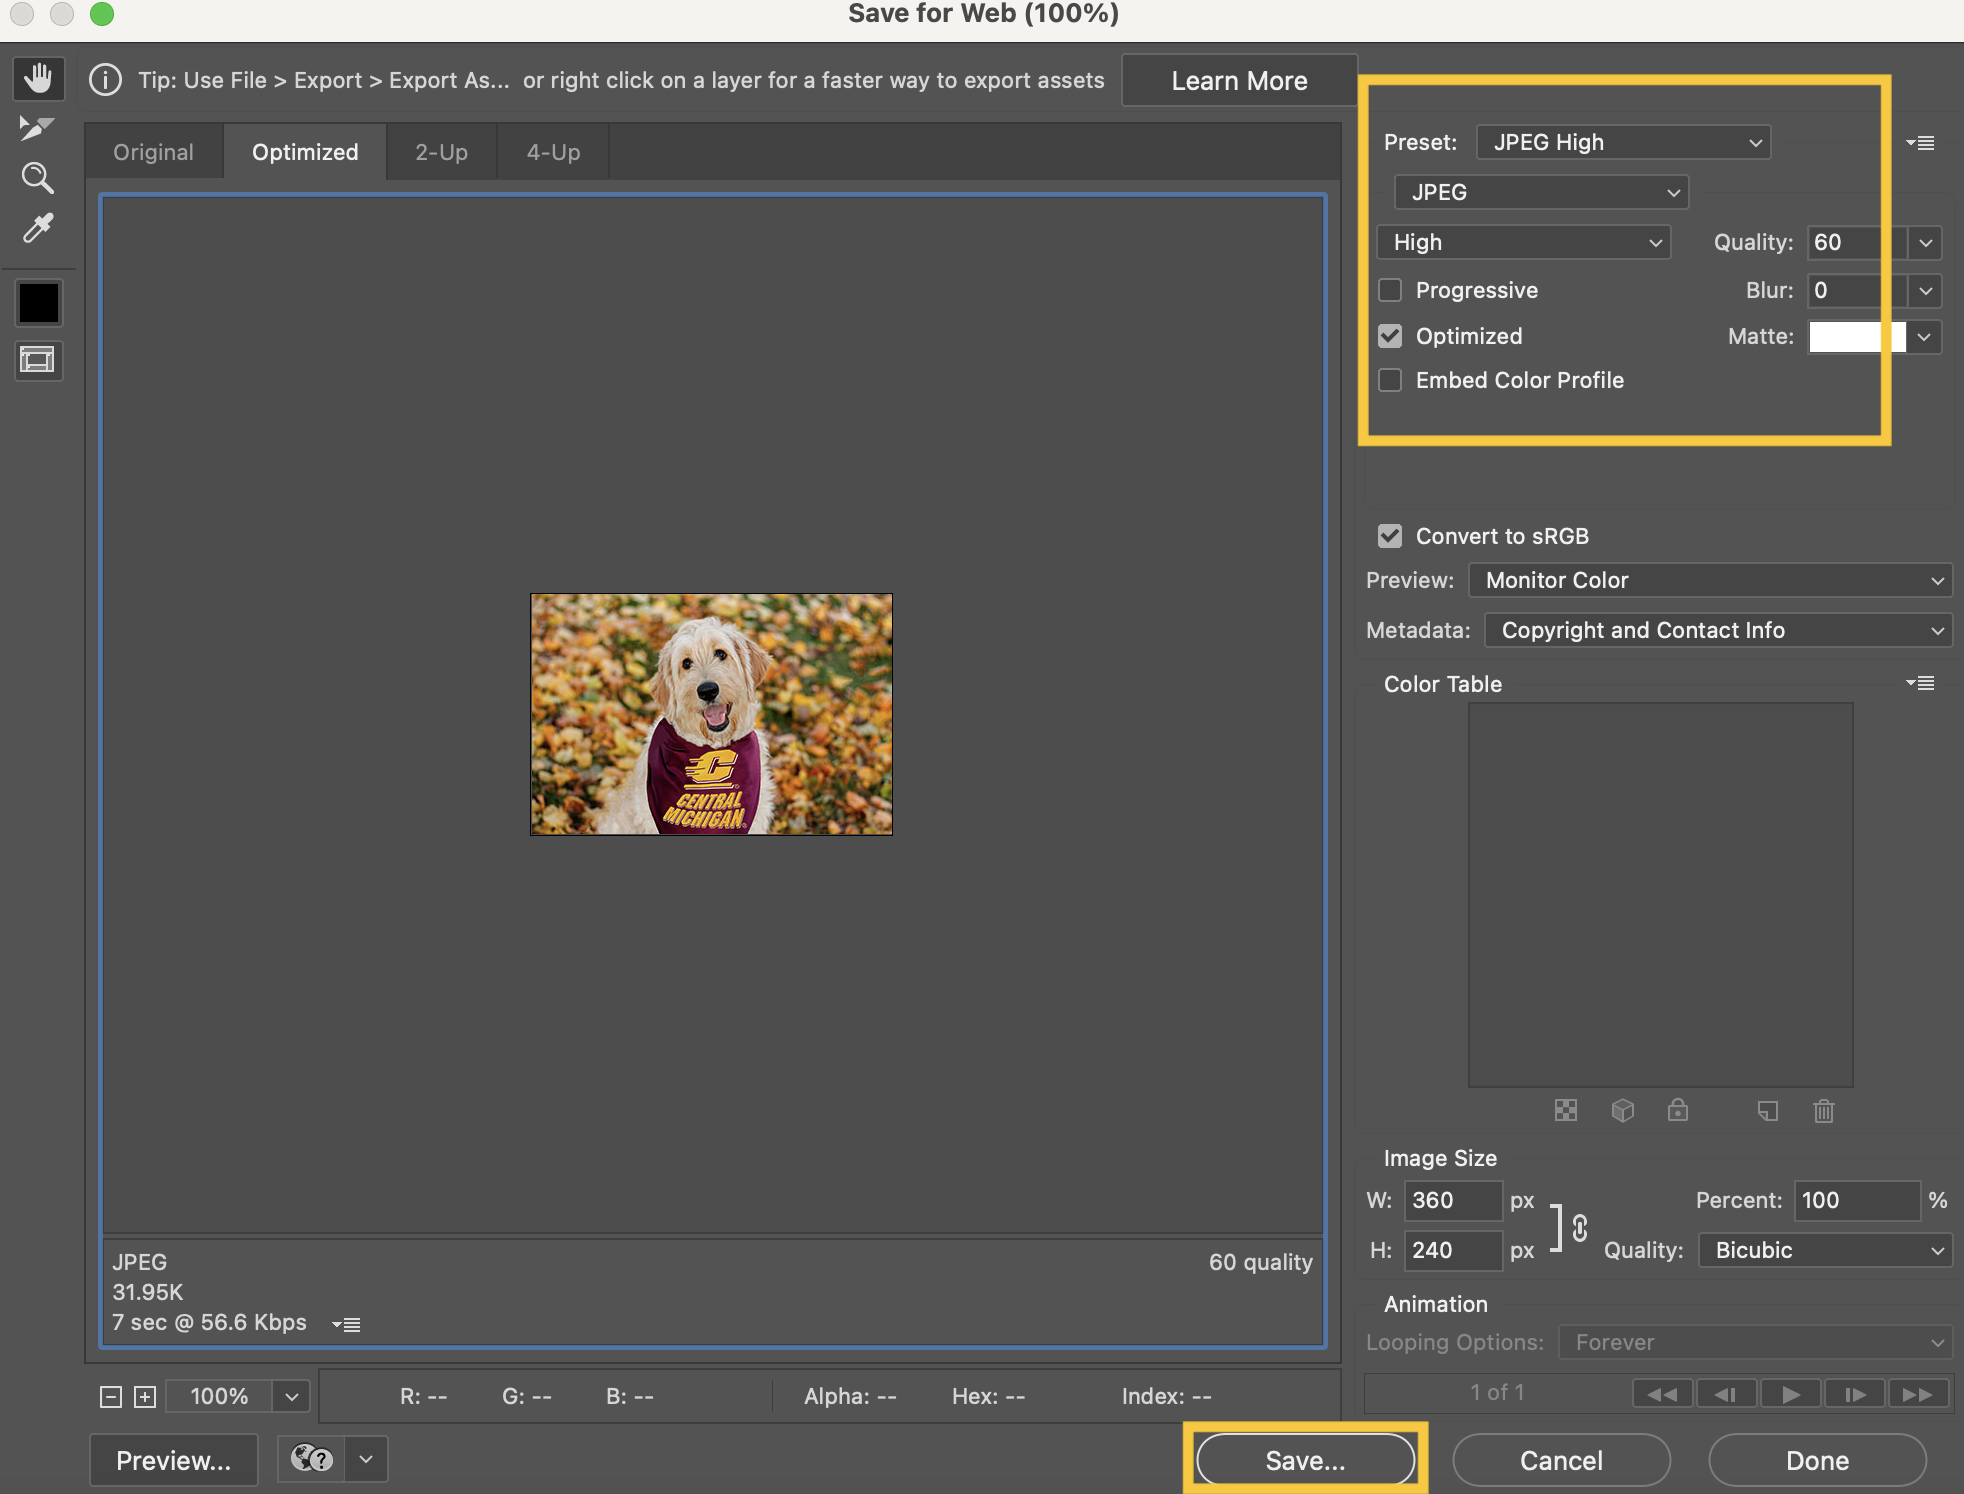
- Here, we're using the dimensions for a thumbnail image, 360 pixels wide by 240 pixels tall.
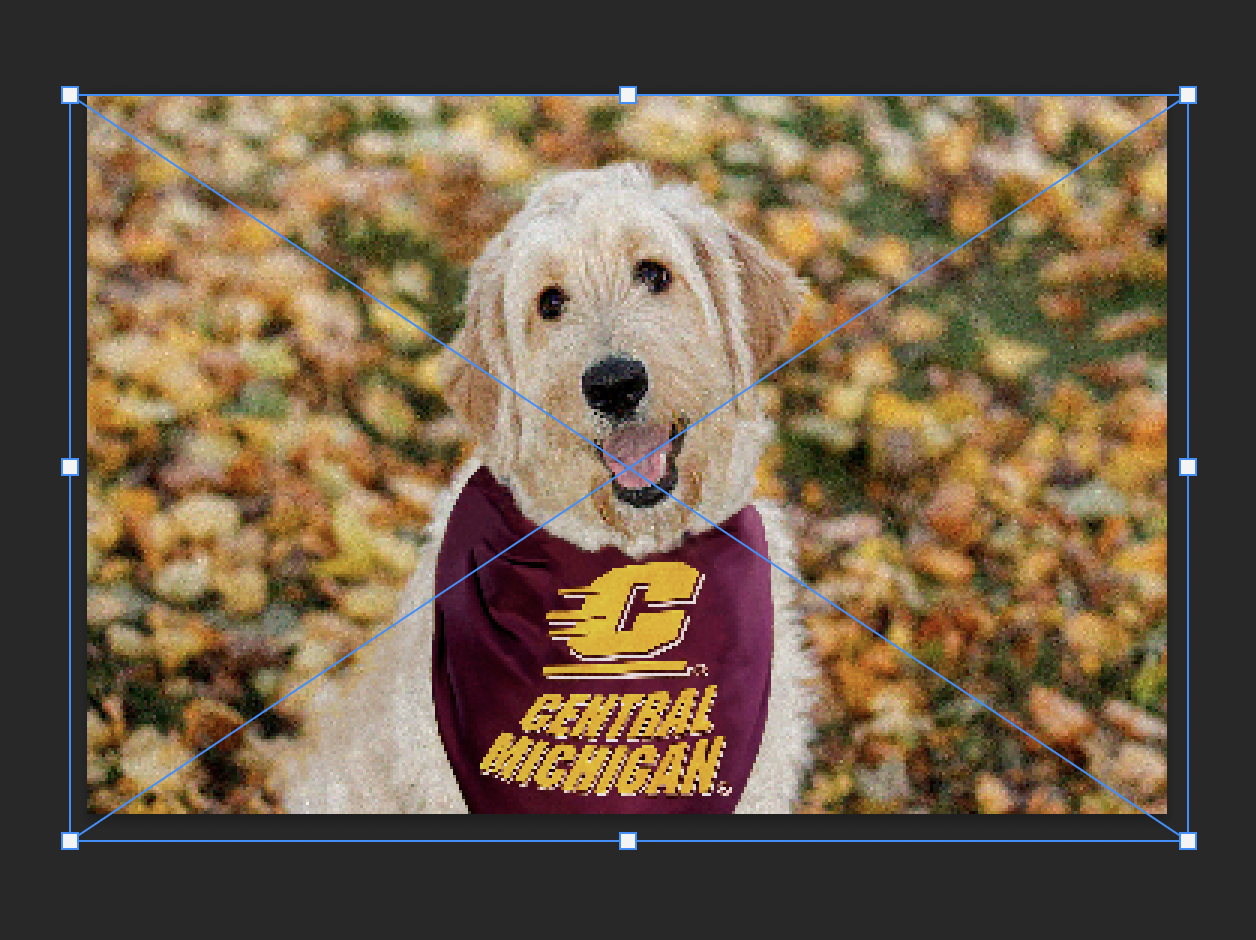
7. Use the corner boxes to change the size of your image to fit your project square.
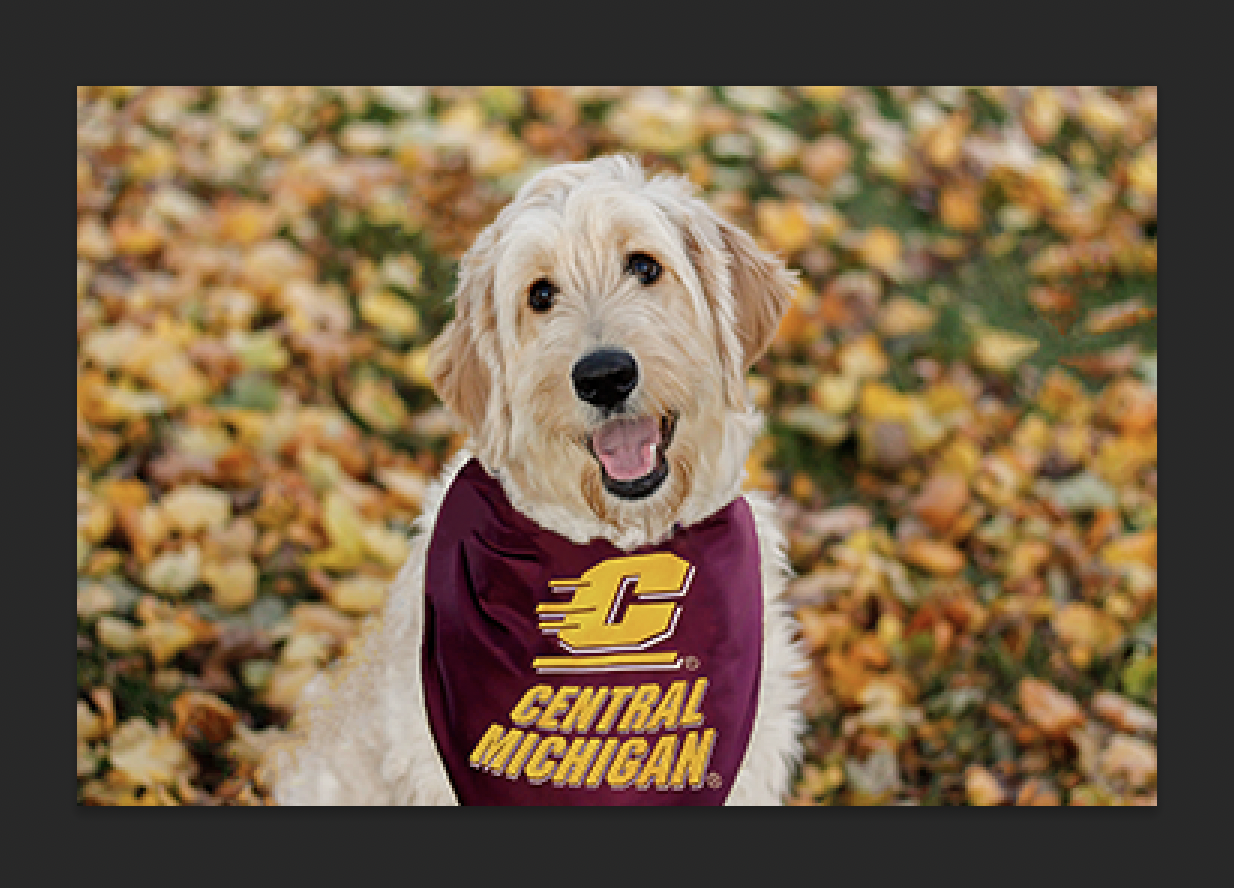
Once the image fills your workspace, push the enter key.

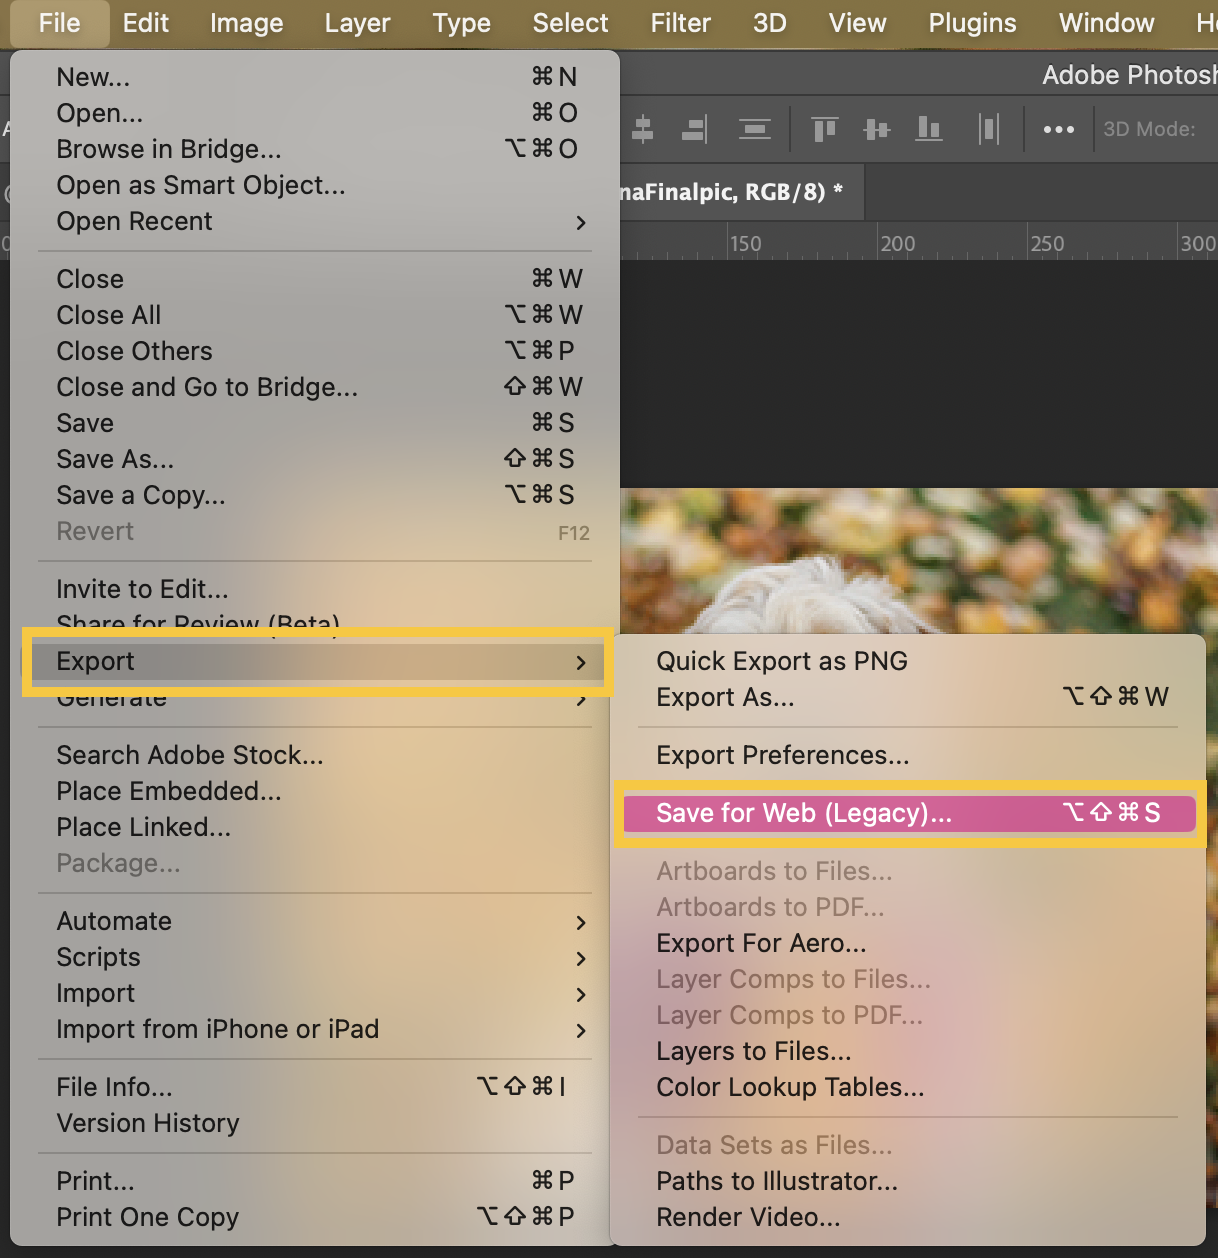
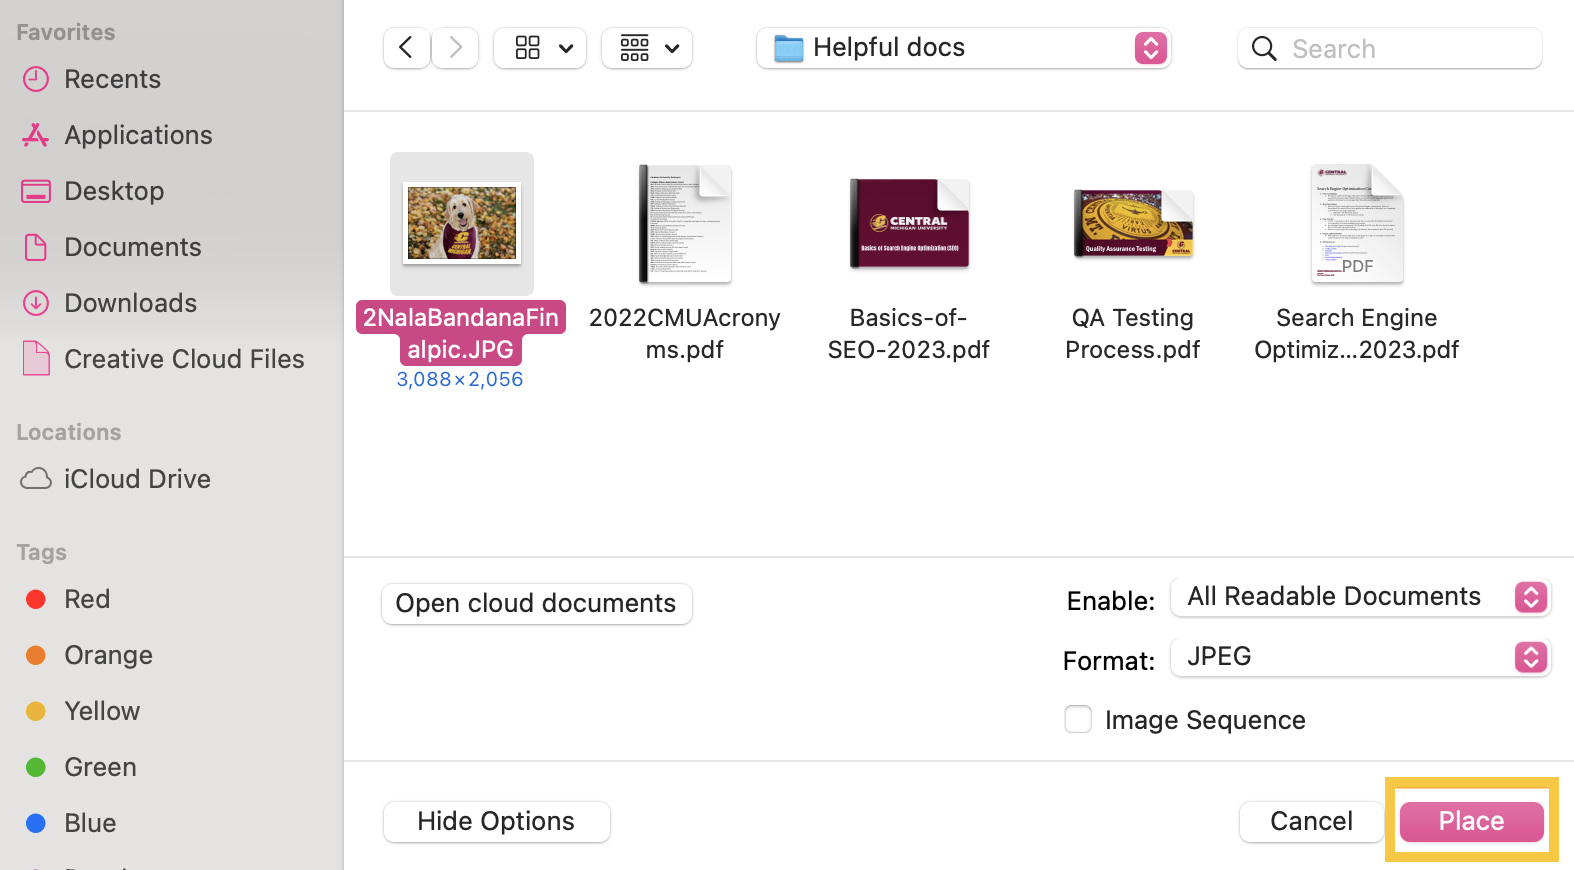
10. Verify the image format is either .JPG or .PNG under Preset.
11. Click Save.
12. Update the name of the image file in the pop-up window.
13. Click Save.
Make sure you have saved your image in a place where you can easily access it, like a specific folder or on your desktop.

14. Once the image has been resized, optimize it using ImageOptim, if you are on an Apple machine, or another program.