Blue Chevron Layout
For use in the Main Content area.
Easily draw attention to mission-critical callouts by adding this layout.
Blue chevron layout examples
The first example is of an image included, along with copy.
The second example is of no image, copy, and a CTA button.
Whichever variation you choose, ensure they are both balanced and equal on both sides!
Example #1
Visit our campus
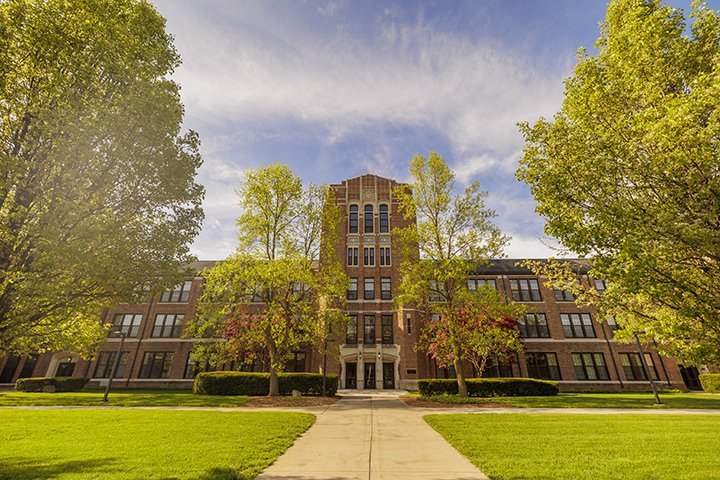
Visiting Central Michigan University's campus is like stepping into a world where learning and nature blend seamlessly. Warner Hall, with its historic charm, embodies the spirit of academic exploration. Walking through its corridors, you feel the energy of students immersed in their studies, making every moment on campus vibrant and inspiring.
Explore athletics

Dive into the world of tennis and serve up some fun on our courts, whether you're a seasoned player or just starting out. With a range of recreational activities, from intramural sports to fitness classes, staying active at CMU is easy and enjoyable for everyone.
Example #2
Schedule your campus tour today
Experience the beauty of Central Michigan University firsthand by scheduling your campus tour today. Book your visit now and discover all that CMU has to offer.
Learn about scholarship opportunities
Unlock your academic potential with CMU's scholarships. From academic achievement to leadership, find the support you need to succeed.
Visual demo
Layout standards
Do:
- Try to balance content on the left and right side for best visual design. That means if you have buttons, ensure both sides have buttons or images.
- The heading should formate should be H3 and should be the same for both columns.
- Images are optional. Image size: 720x480.
Do NOT:
- Include extra text. This will cause the content to stretch, be mindful of your character count.
- Stack blue chevron layouts on top of each other.
Written instructions
1. Navigate to your page. Click "Layout".

2. Scroll all the way down to "grid-6+6-with-accents". Drag the layout into the main content area.

3. Toggle back over to "Content".

4. Let's add content. Scroll down to "Content block" and drag and drop it into the correct area, labeled "Column 2".

5. Click "Create Content"

6. Add in your content.

7. If you are adding an image (images are optional!) then click the image icon.

8. Locate your image.

9. Click "Save".

10. Great job! Now follow the same process for the other side!
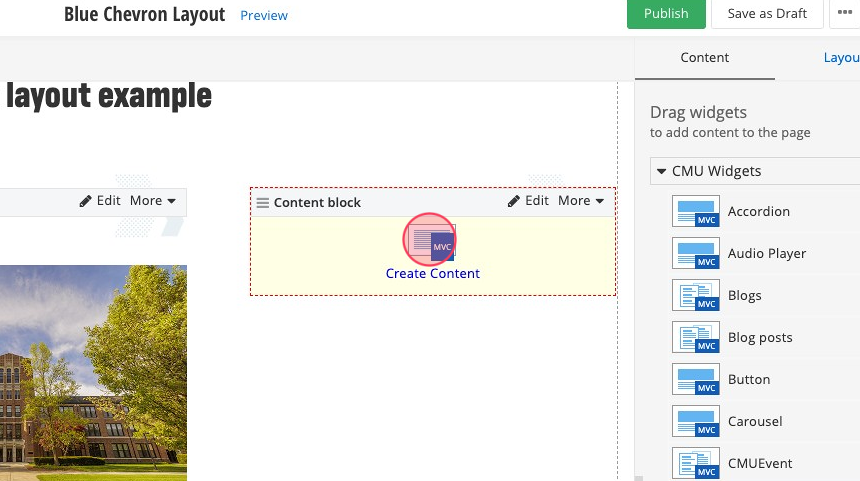
11. If you include a button or CTA (optional!) then go ahead and click the button icon.

12. Make sure you fill out the button requirements correctly.

13. Click "Insert".

14. Click "Save".

15. Click "Save as Draft".
