Pages
In the Pages section, you will find a complete list of all pages built within Sitefinity and the status of those pages. This is where you'll start creating or editing a page.
From the main Sitefinity menu, click on Pages.

Pages overview
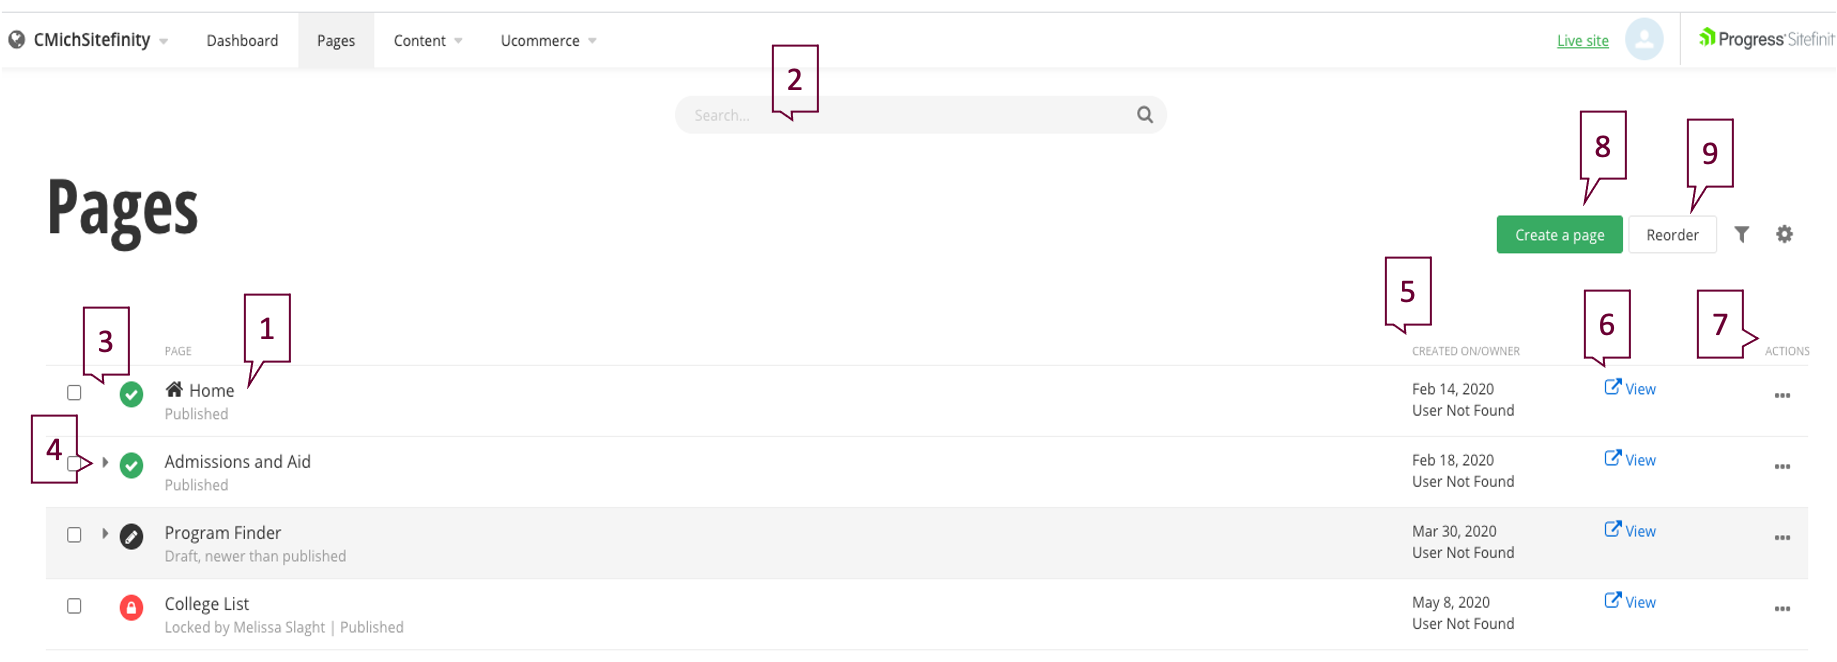
- Page Name: You can edit a page by clicking on its name. Note that pages are not listed alphabetically by name or by division, rather the pages are listed by how an end-user would search for the content.
- Search: Locate pages with the search function.
- Page Status: Quickly see the status of a page.
 green check = published page
 black editor pencil = draft page
 red lock = locked for editing page
 - Child Page: A carrot
 indicates there is a child page nested beneath the parent page.
 - Creation date and owner: View the date the page was originally created and by whom.
- View: Click this to preview a page or copy the link address.
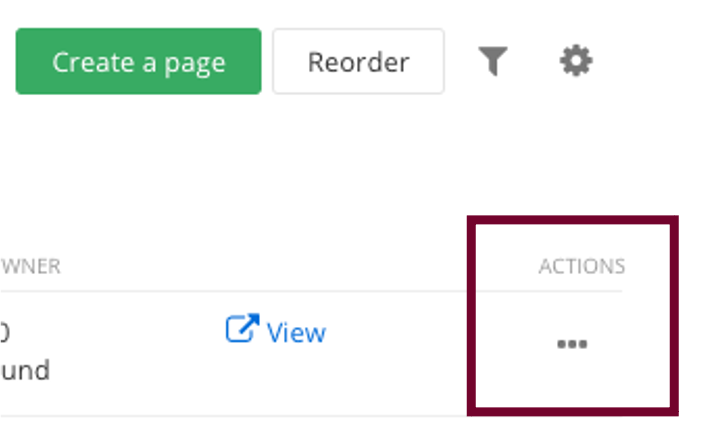
- Actions: Use this ellipses menu to edit content, title and properties, create a child page, duplicate the page, share preview link, change the page owner, view revision history and items linking to the page. See "Editing Title and Properties"
below for a complete description of this section of the Actions menu.
- Create a Page: Click this button to create a new page.
- Reorder: Use this feature to reorder your page in the listing.
Instructions
1. From the Sitefinity main menu, click on Pages.
2. Click on the "Actions" ellipses for the page you'll edit.
3. If working from within a page, click on the ellipses icon next to the Save as Draft button.
or from within a page:

Next step: build a page
Now that you've set up your page properties, you're ready to finish building a page with templates, widgets and layouts.