Social Media Buttons
Use the Social Media Buttons widget to link to your department’s social media accounts.
If you want users to share your page on their own social media, use the Share On Social Links widget instead.
Social media buttons example

Visual demo
Widget standards
Do:
- Use this widget to add social media buttons that create links for users to follow your organization such as including a link to Facebook, X (Twitter), YouTube, Instagram and LinkedIn.
- Use only one widget per page.
Do NOT:
- Put this widget in any containers other than the designated one in the left sidebar under the page navigation.
Written instructions
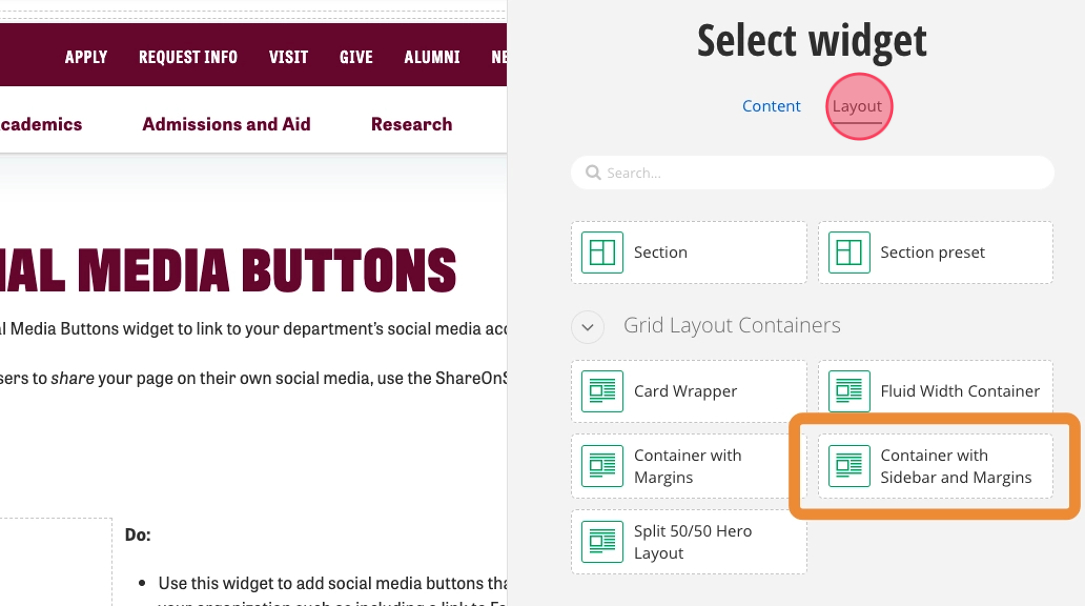
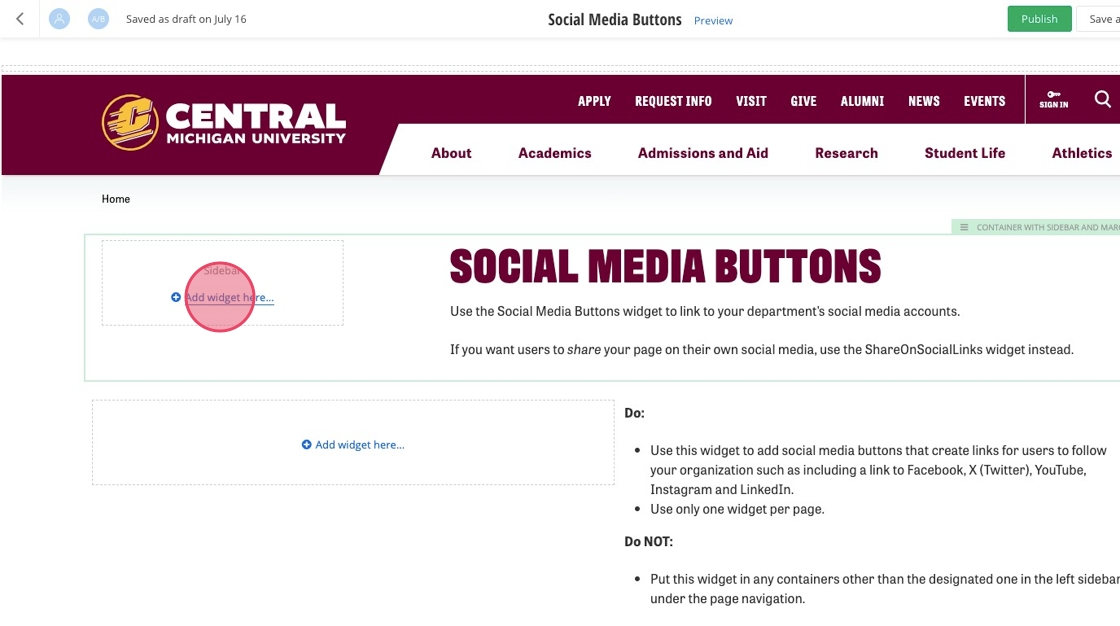
1. Before getting started, ensure your page has a "Container with Sidebar and Margins". You can find this by clicking "Layout" in the side widget selection.
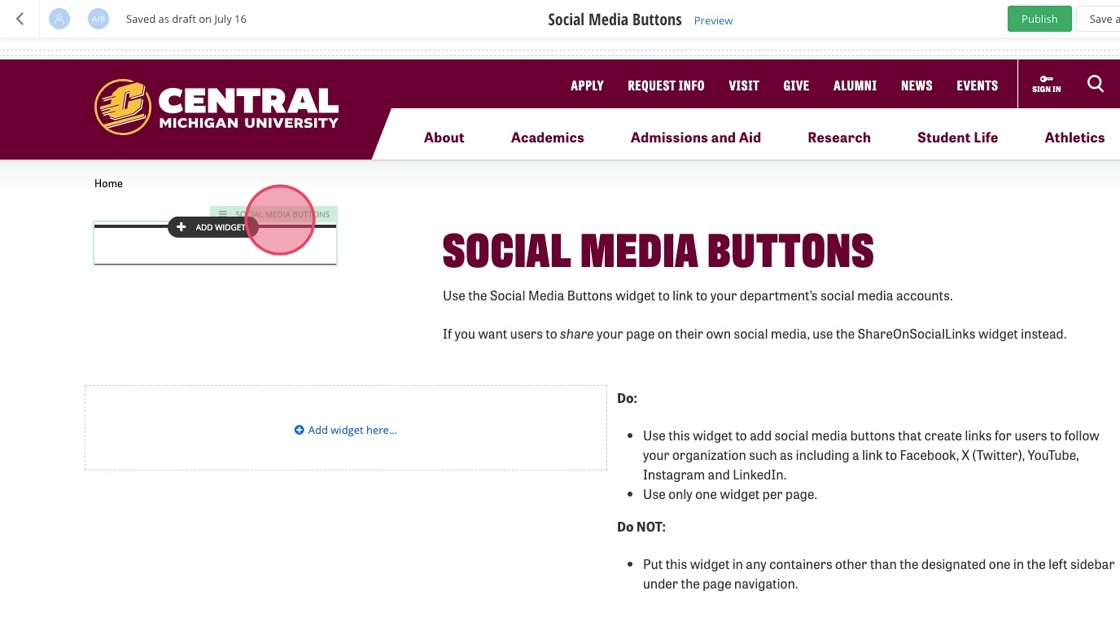
2. Now that you have a sidebar, click "Add widget here..."
3. Under "Content", select "Social Media Buttons".

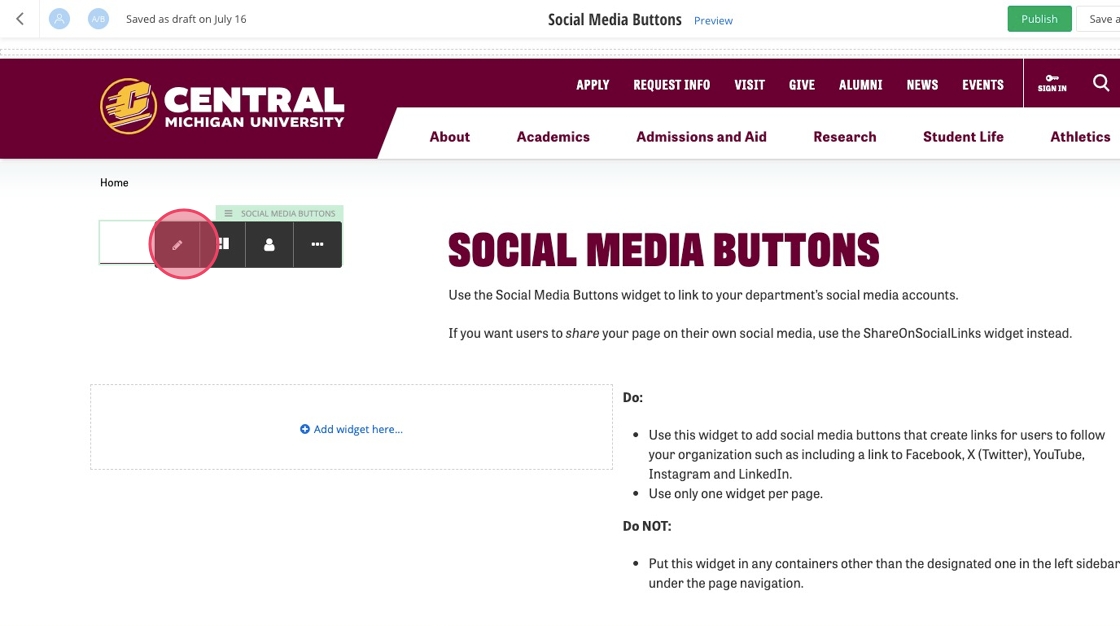
4. Click the green tab.
5. Click the pencil icon.
6. Add your heading.
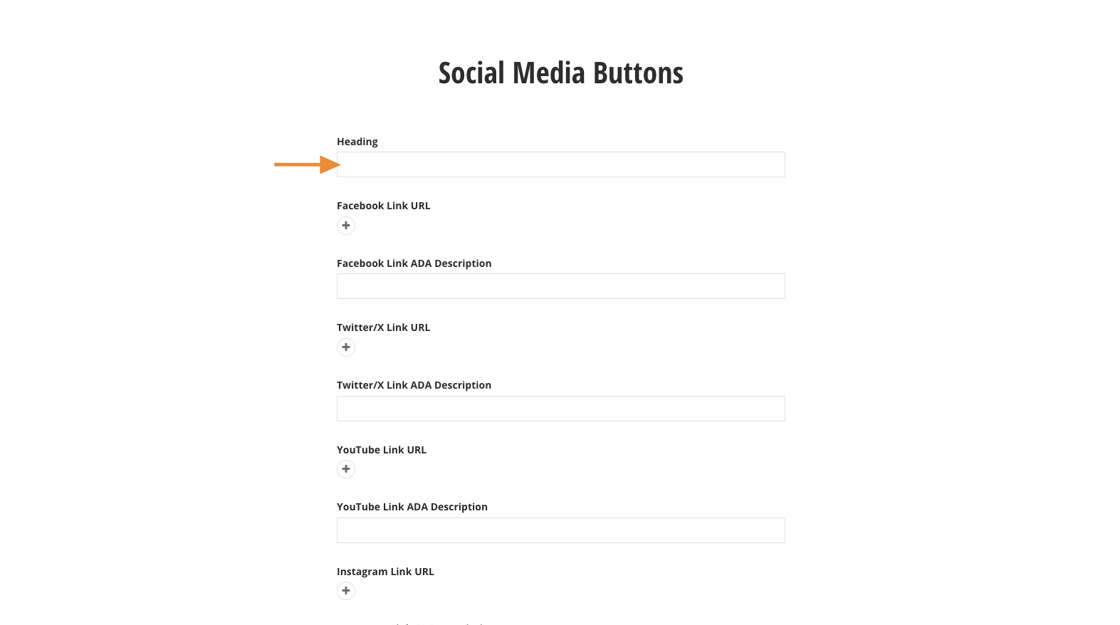
Tip: If you don't have an account with the following platforms, feel free to skip them.
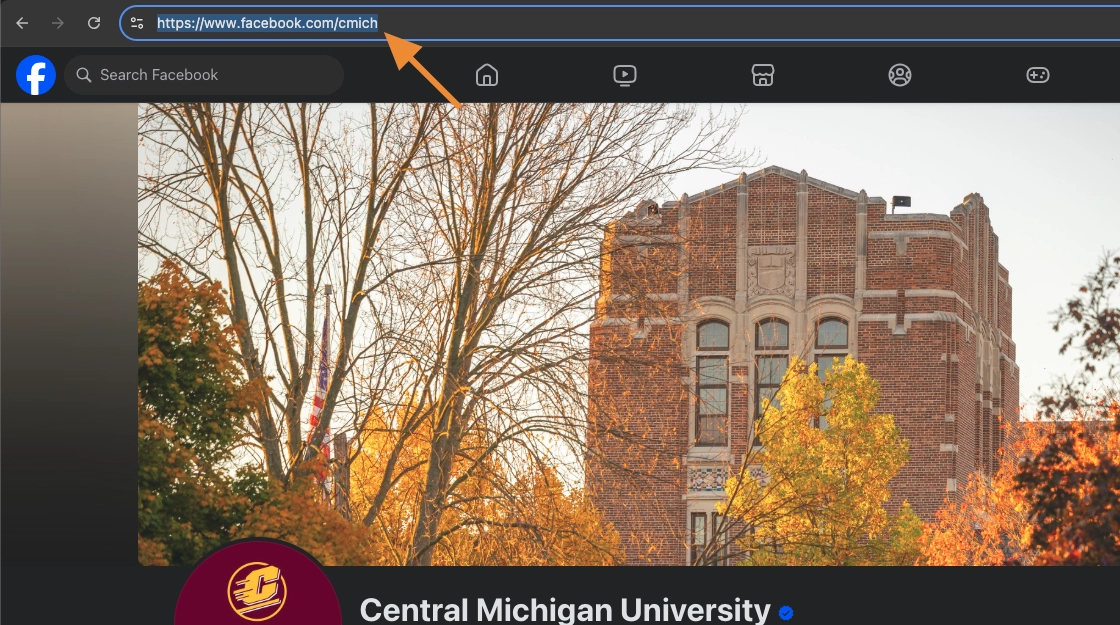
7. Switch to your Facebook page's tab and copy the URL.
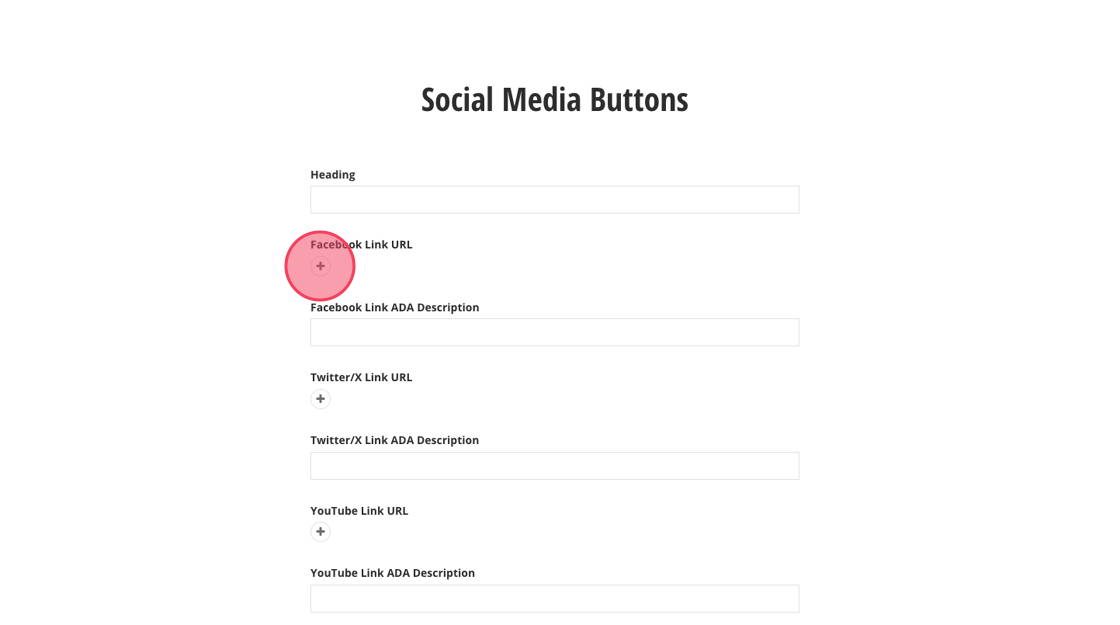
8. Switch back to Sitefinity and click the "+" on the Facebook Link URL.
9. Paste the URL into the "Link to..." field.
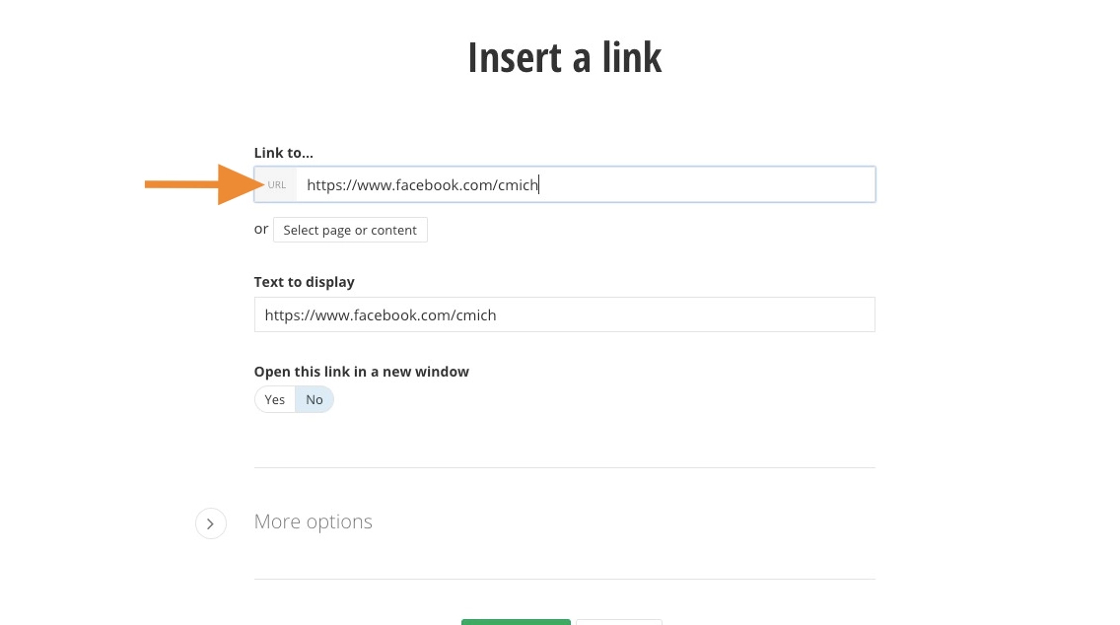
10. Type "Facebook" into the "Text to display" field.
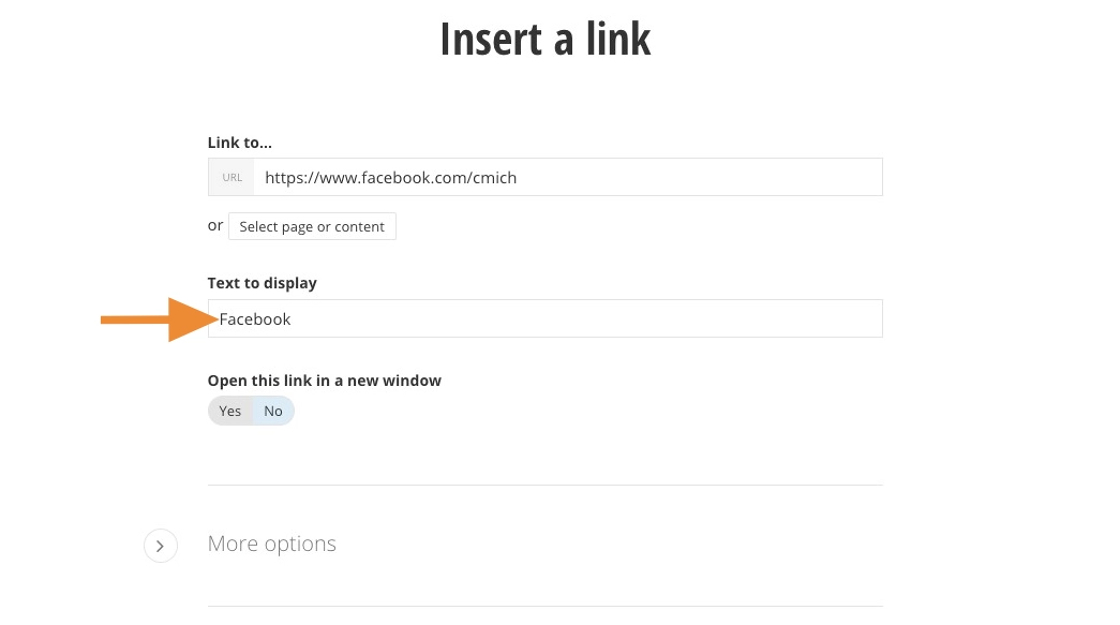
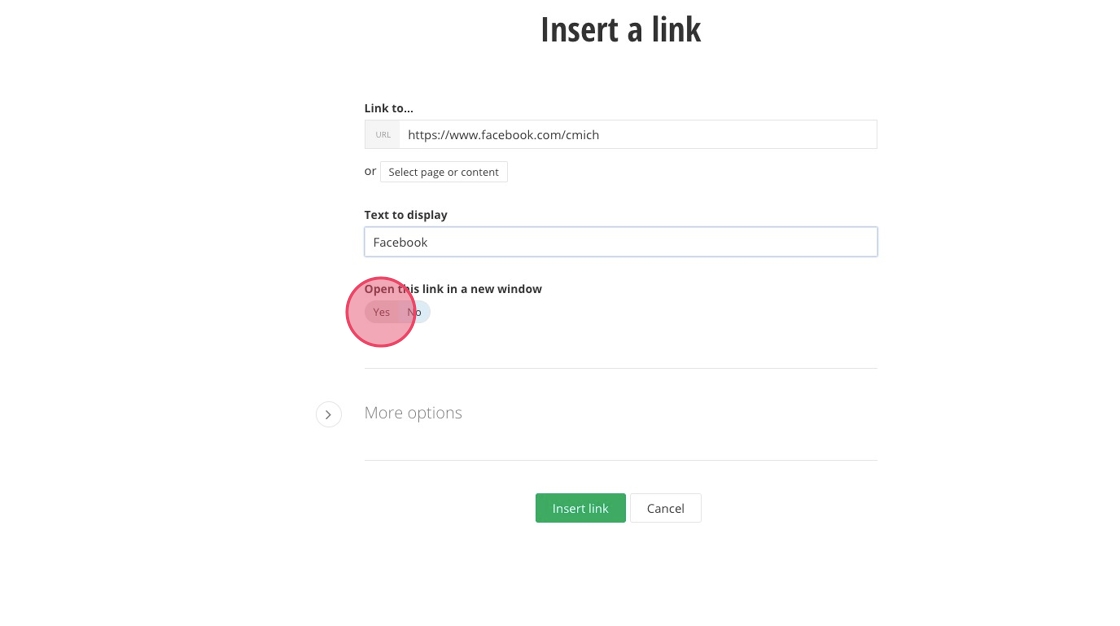
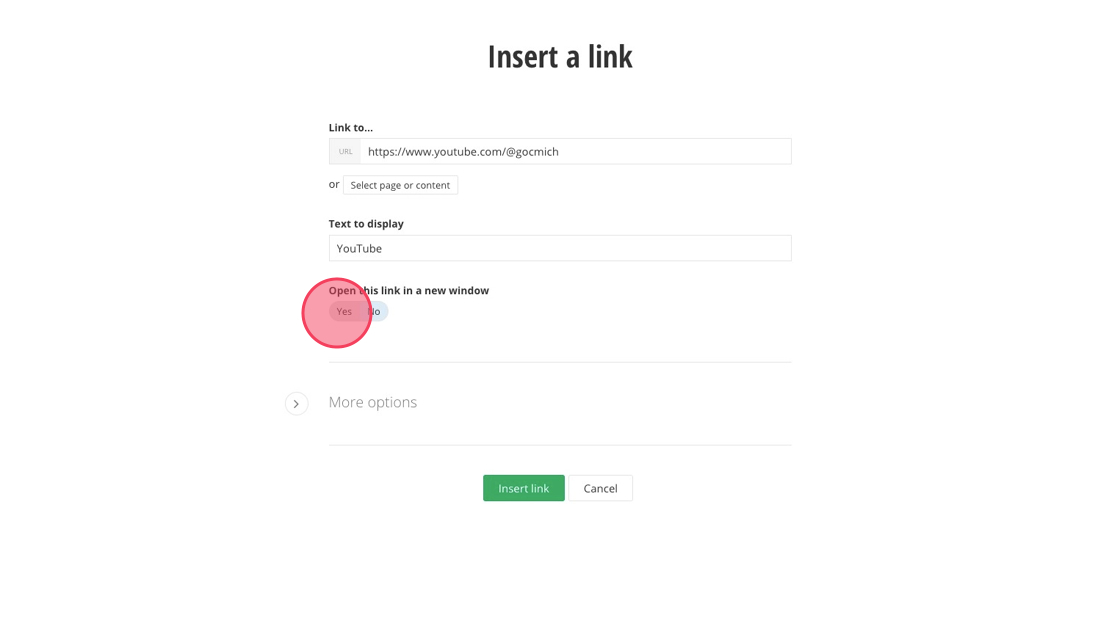
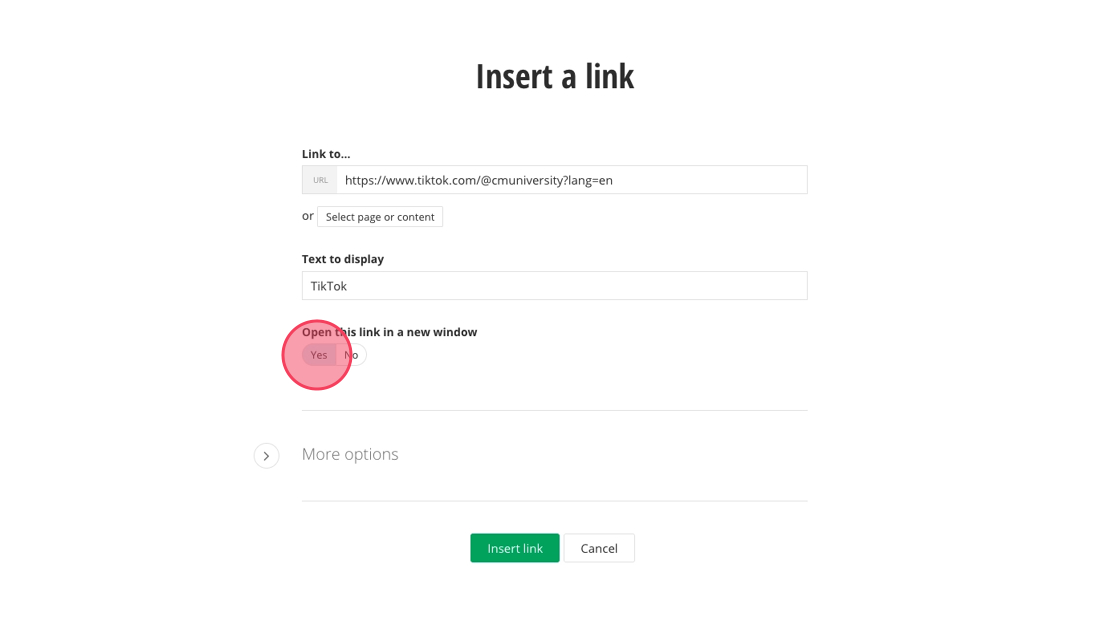
11. Click "Yes" so users open the link in a new window.
All external sites must be opened in a new window.
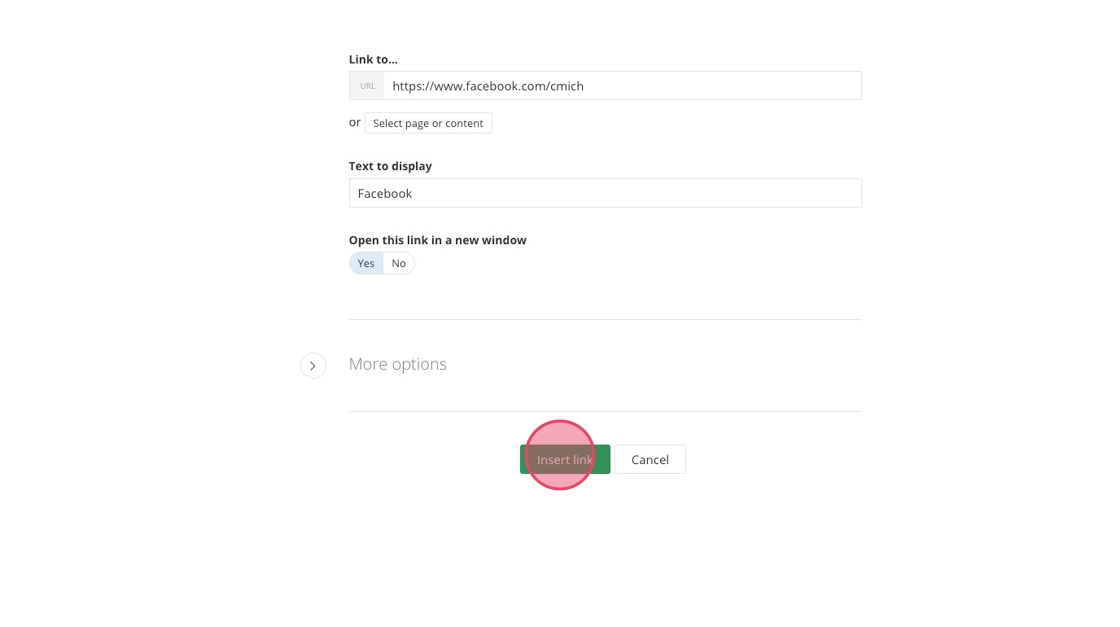
12. Click "Insert link".
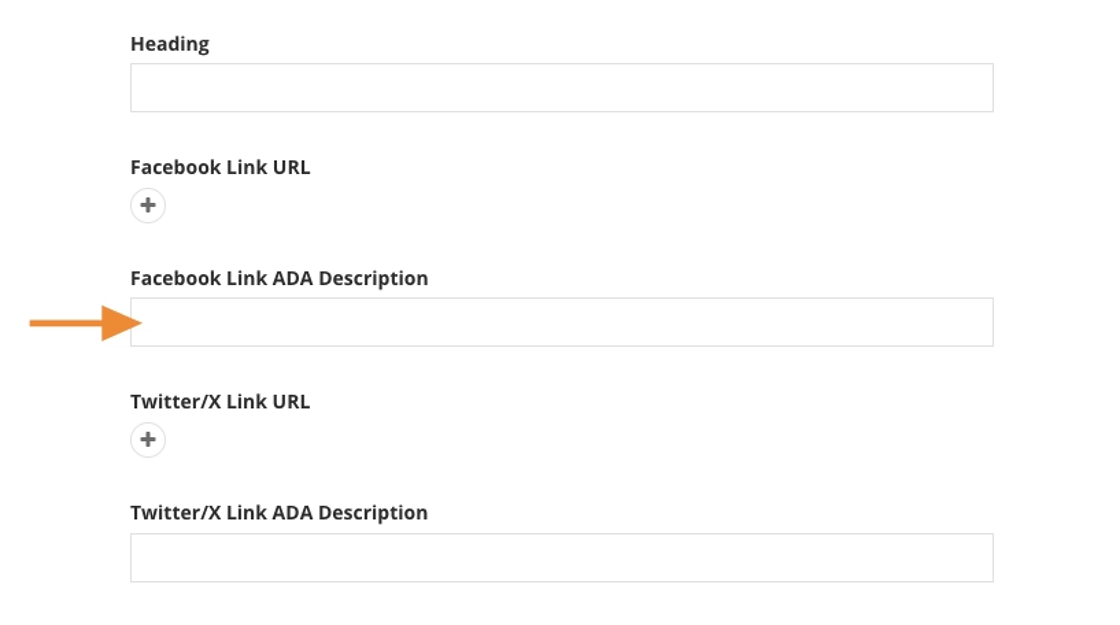
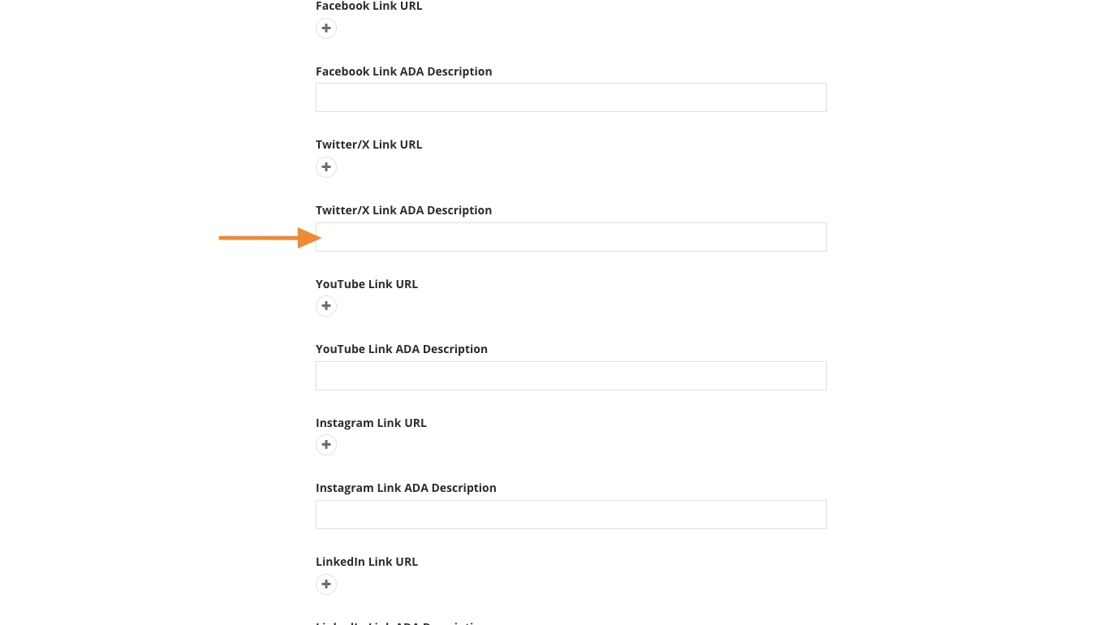
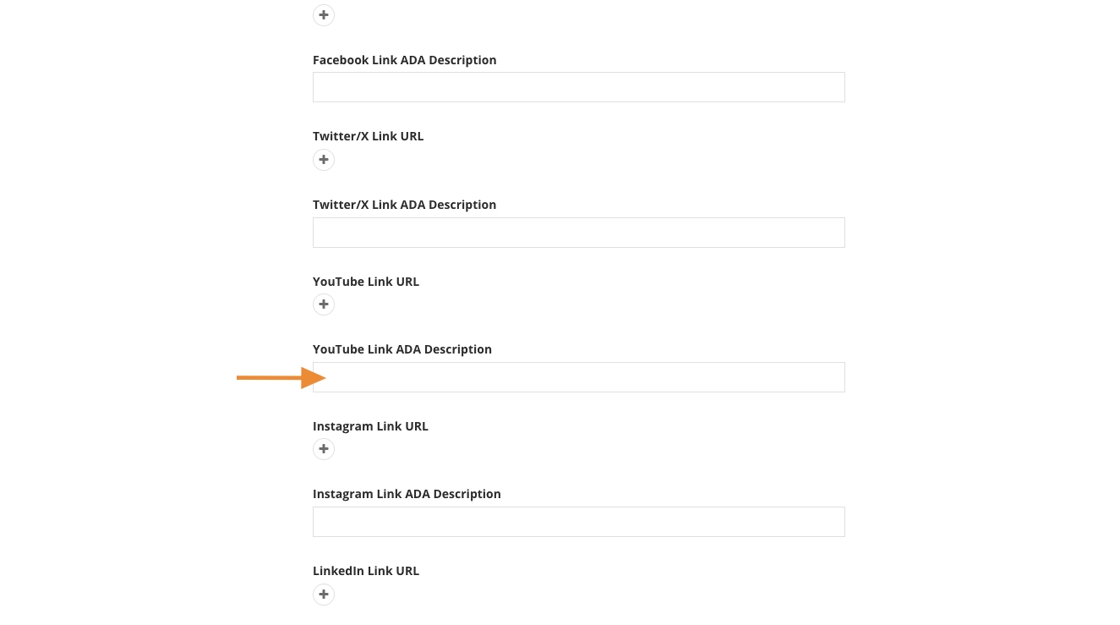
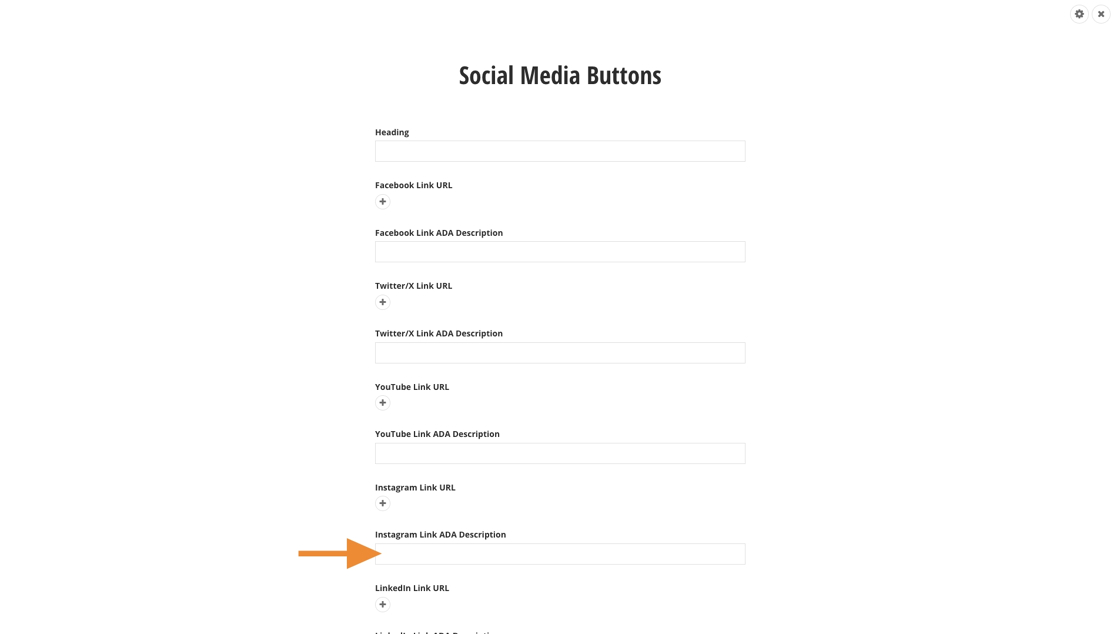
13. Fill out the "Facebook Link ADA Description" field.
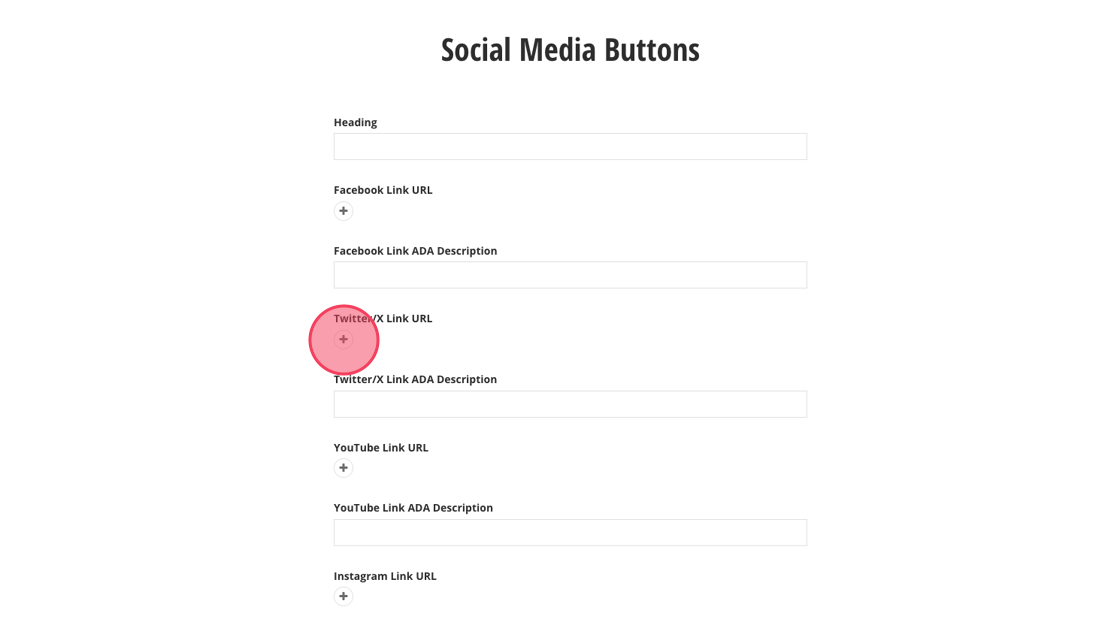
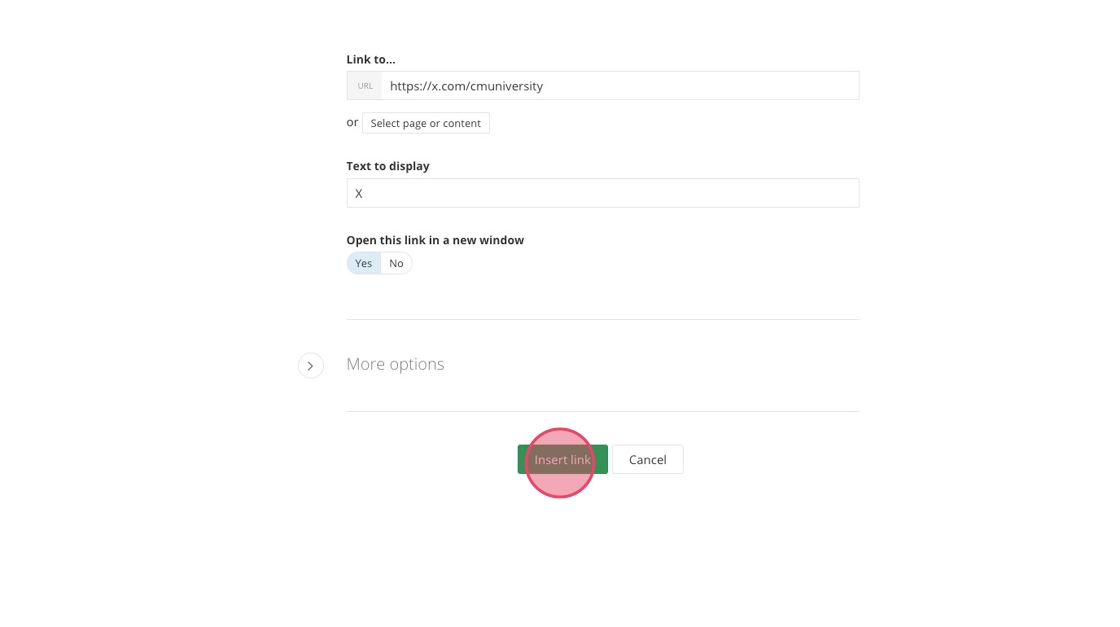
14. Switch to your X (Twitter) page's tab and copy the URL.
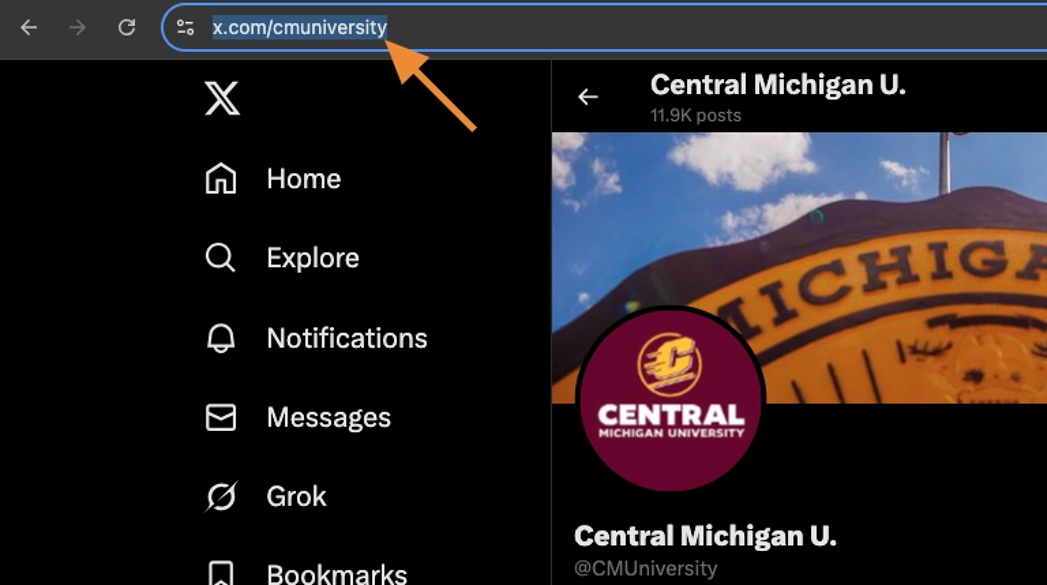
15. Switch back to Sitefinity and click the "+".
16. Paste the URL into the "Link to..." field.
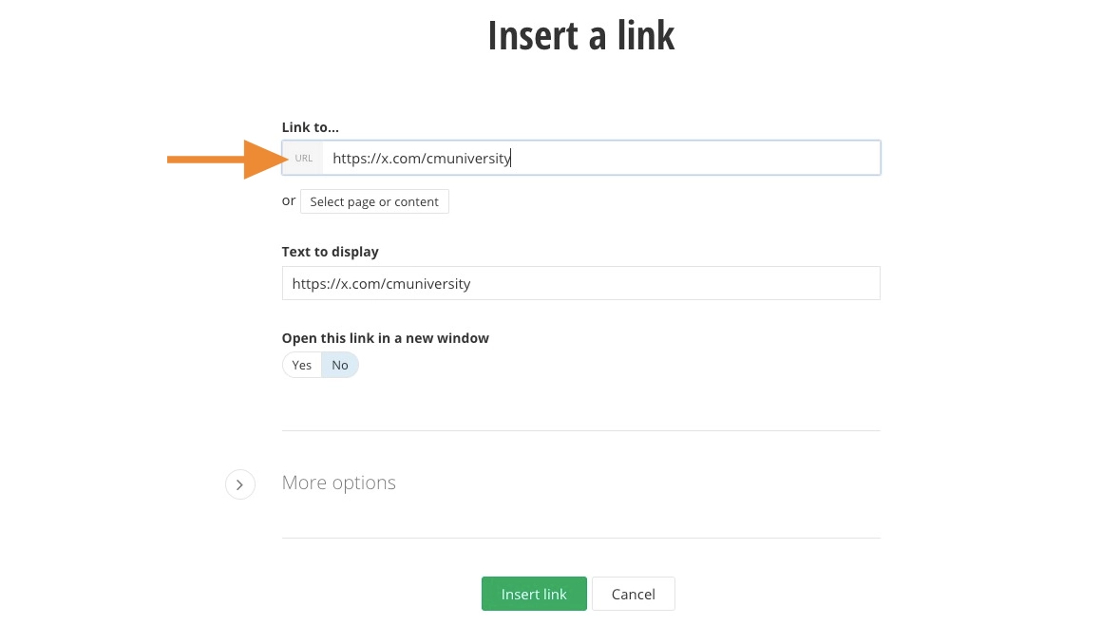
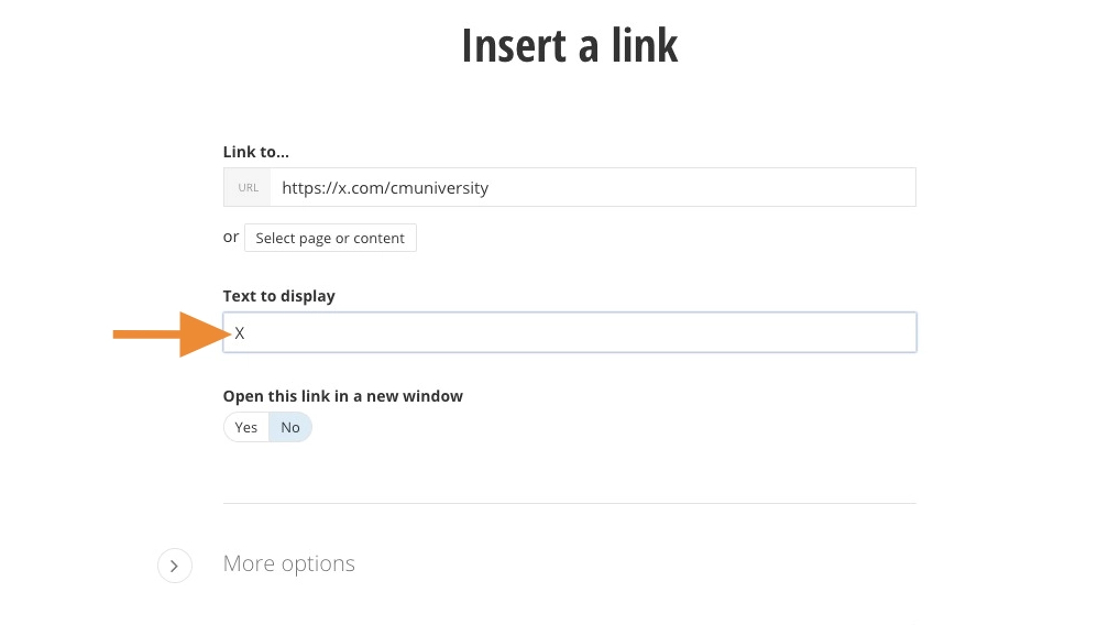
17. Type "X" into the "Text to display" field.
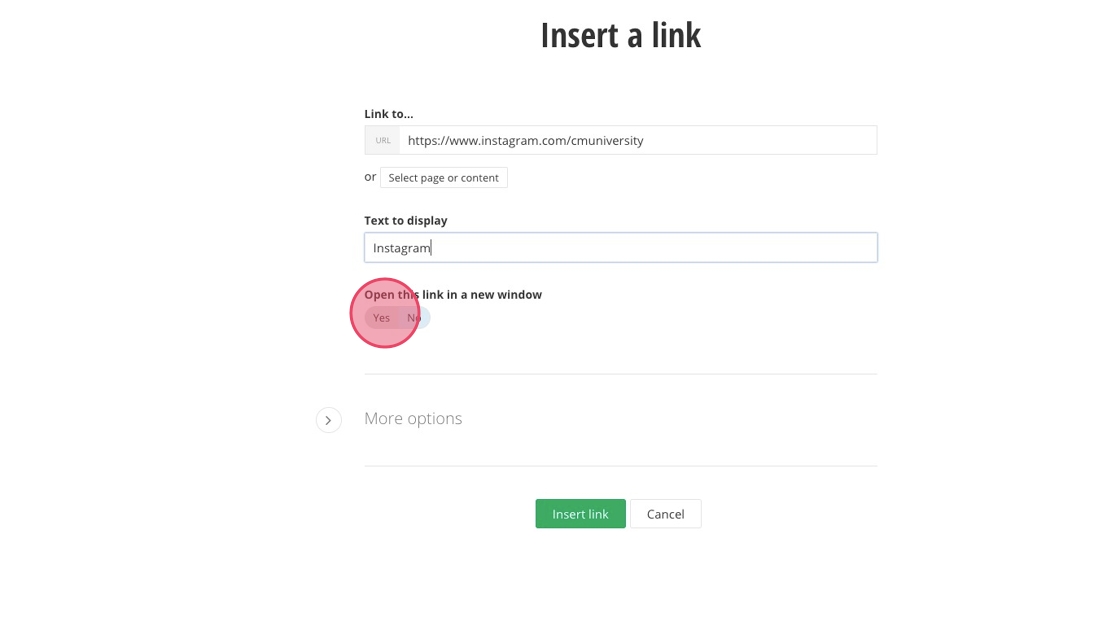
18. Click "Yes".

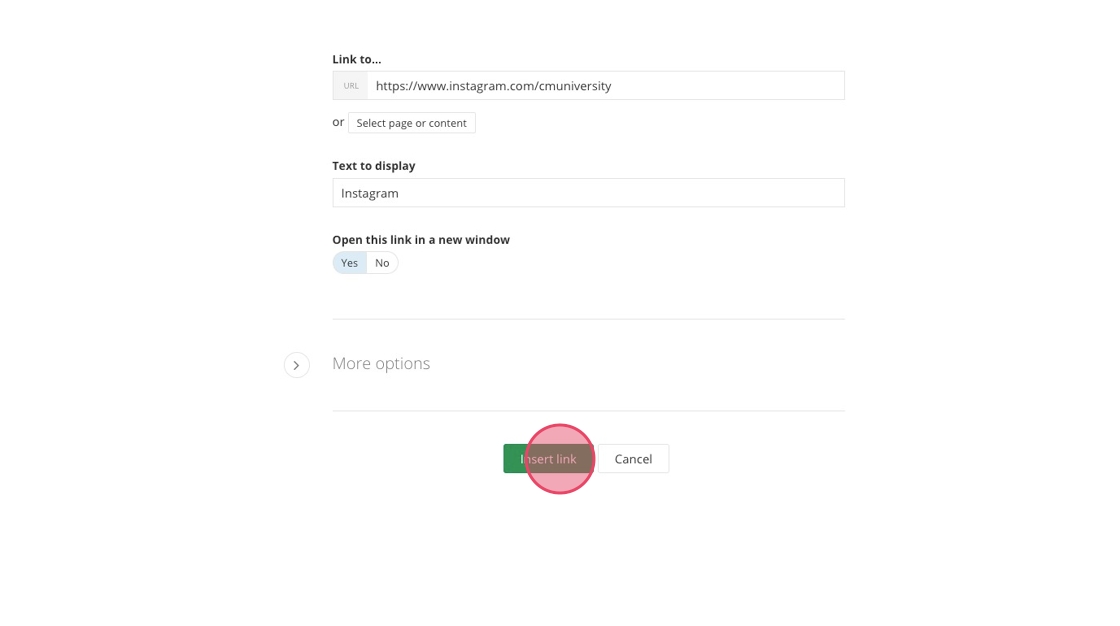
19. Click "Insert link".
20. Fill in the ADA Title field.
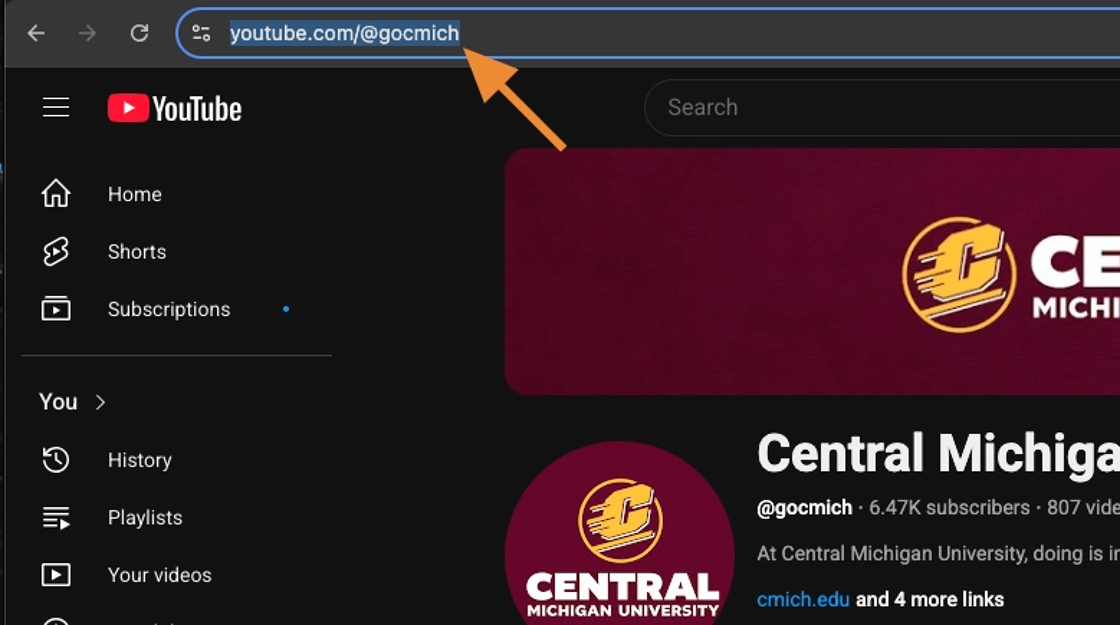
21. Switch to your YouTube channel's tab and copy the URL.
22. Switch back to Sitefinity and click the "+".
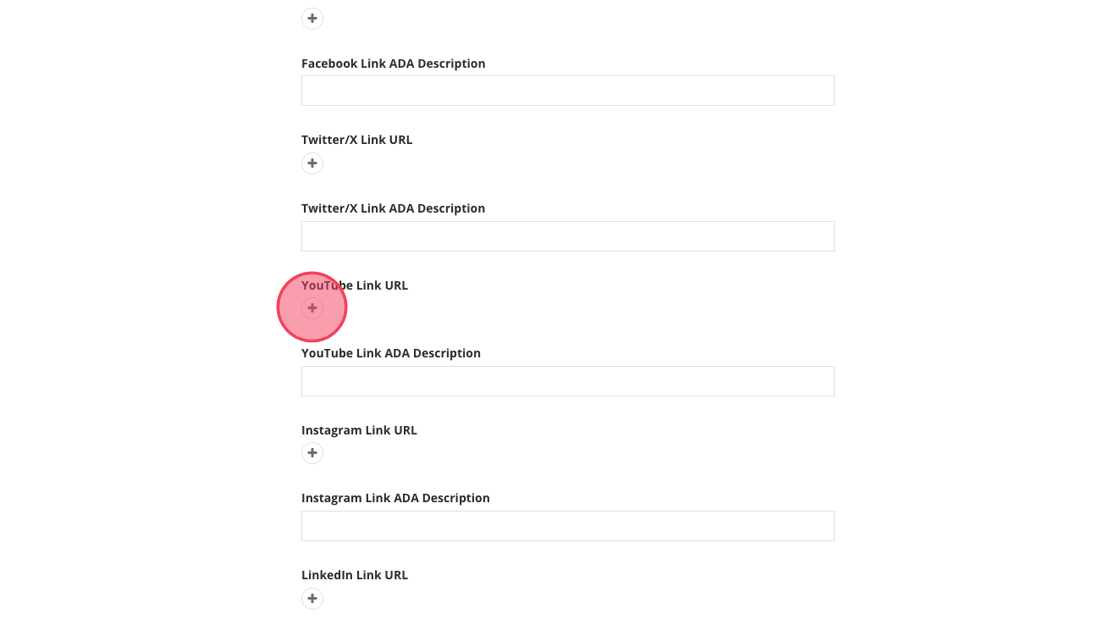
23. Paste the URL into the "Link to..." field.
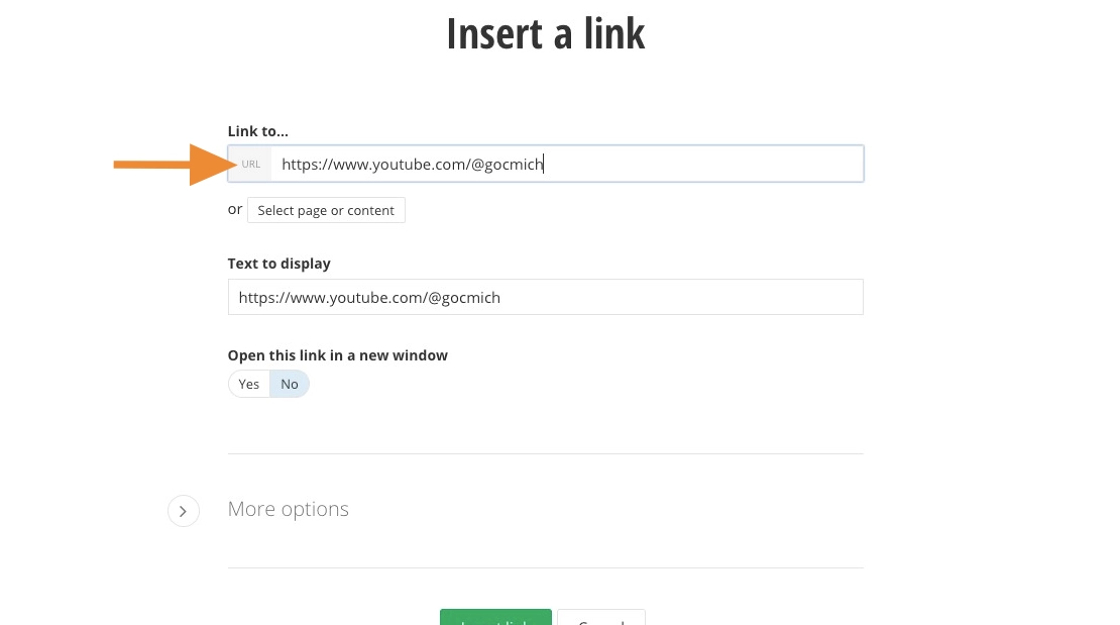
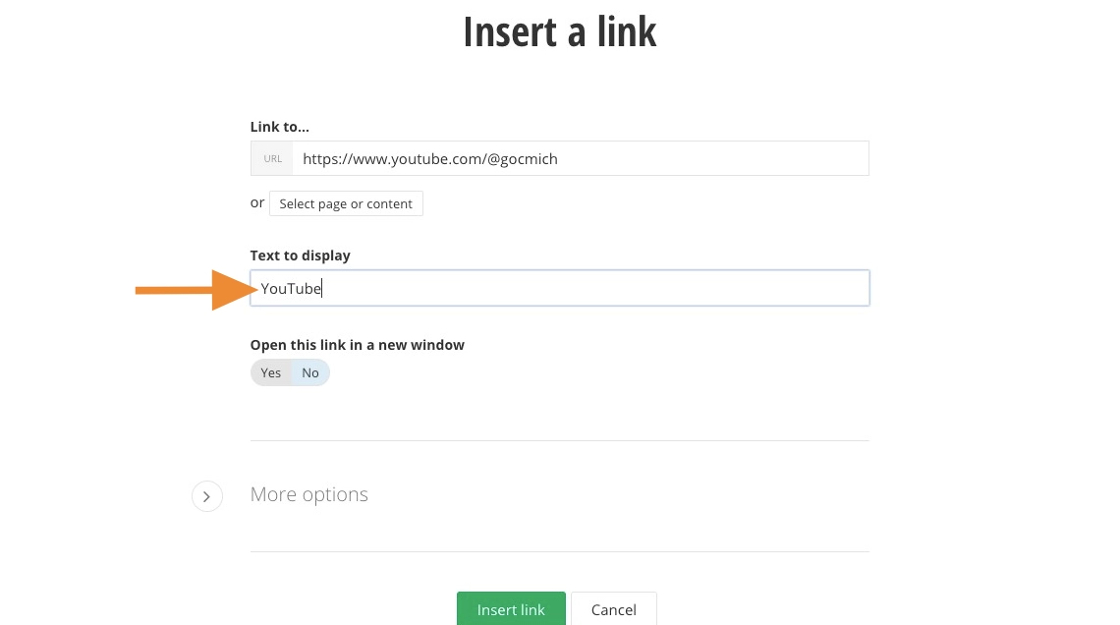
24. Type "YouTube" into the "Text to display" field.
25. Click "Yes".
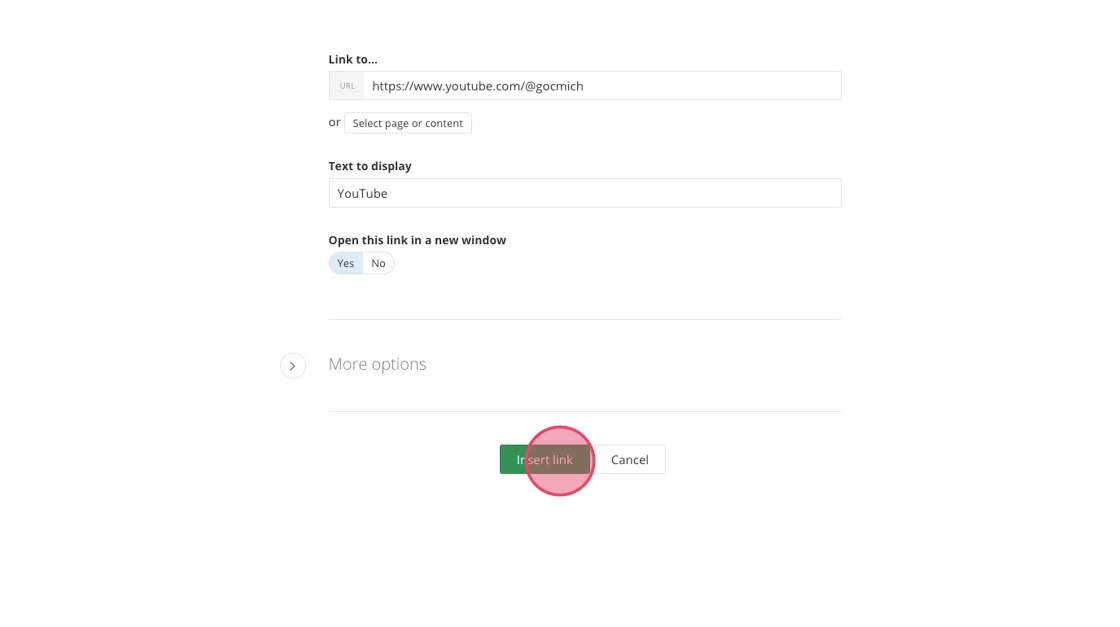
26. Click "Insert link".
27. Fill in the ADA Title field.
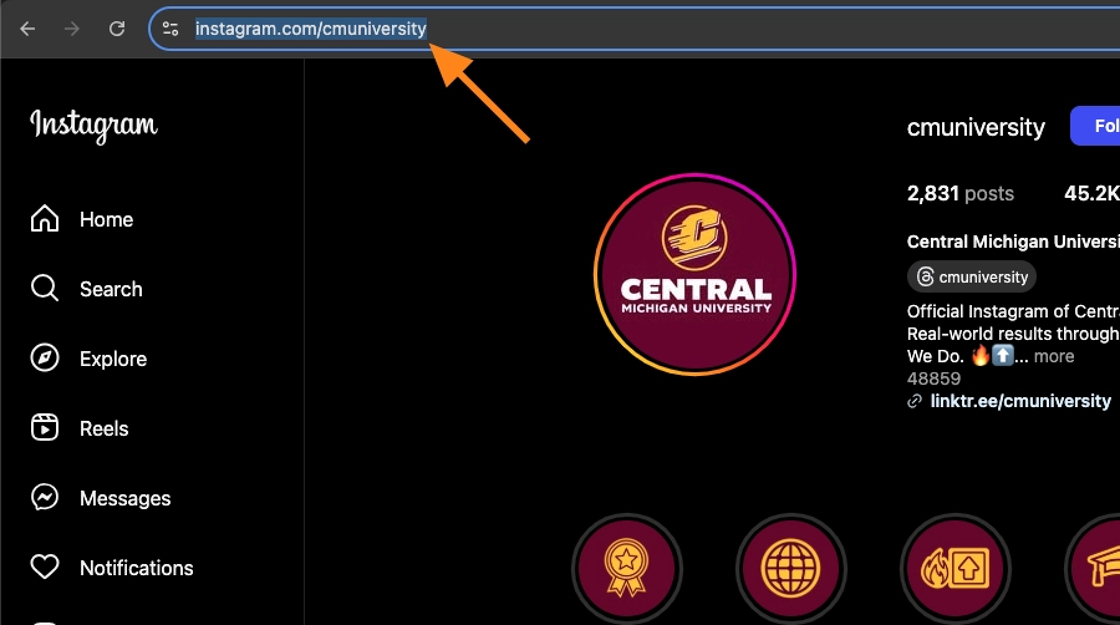
28. Switch to your Instagram page's tab and copy the URL.
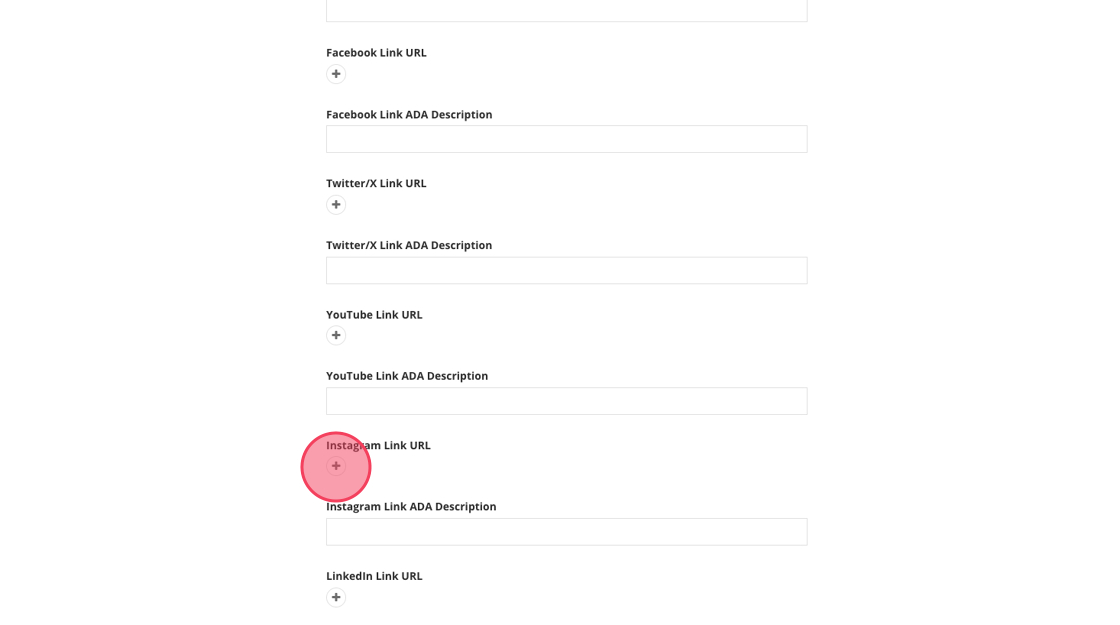
29. Switch back to Sitefinity and click the "+".
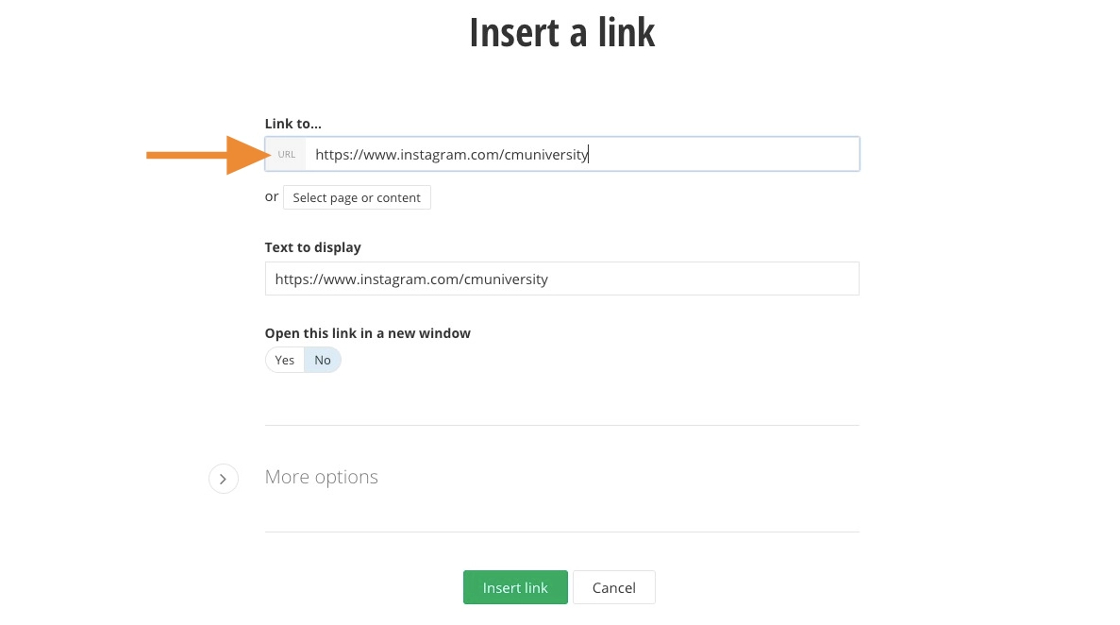
30. Paste the URL into the "Link to..." field.
31. Type "Instagram" into the "Text to display" field.

32. Click "Yes".
33. Click "Insert link".
34. Fill in the ADA Title field.
35. Switch to your LinkedIn page's tab and copy the URL.
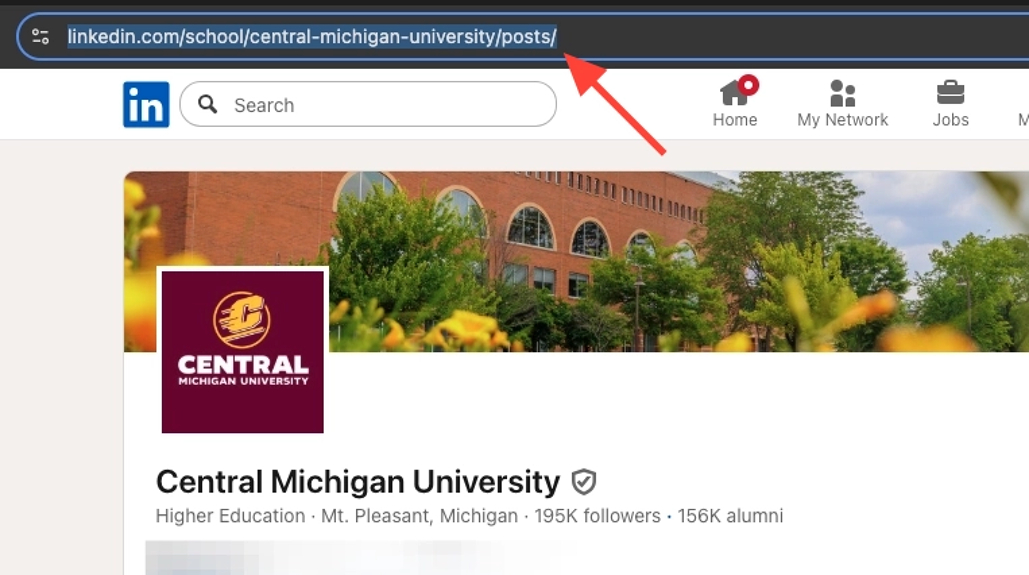
36. Switch back to Sitefinity and click the "+".

37. Paste the URL into the "Link to..." field.
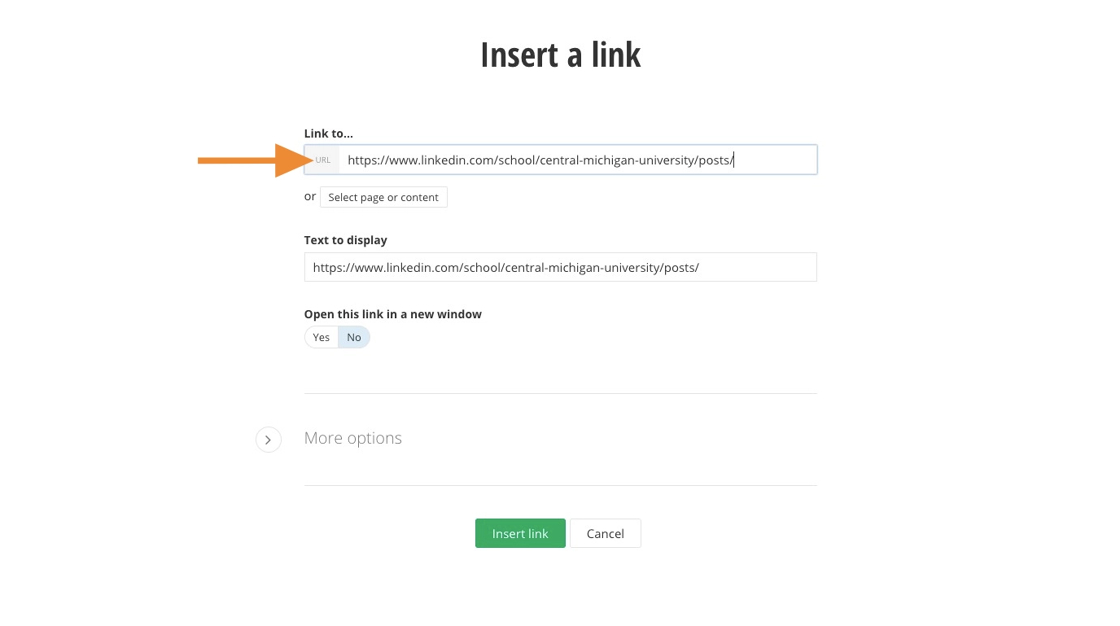
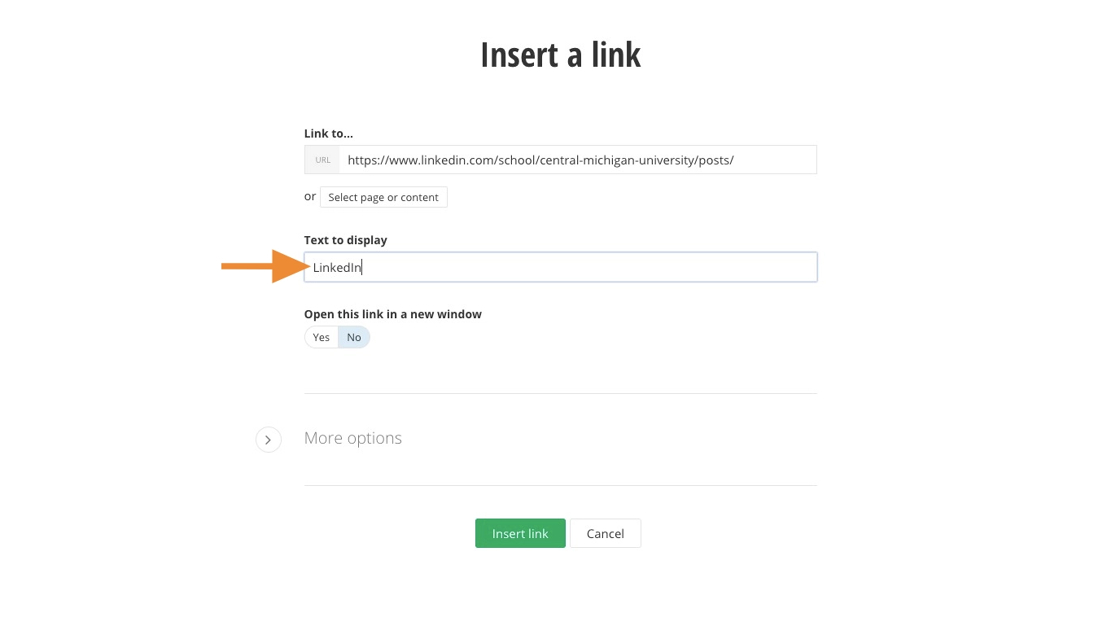
38. Type "LinkedIn" into the "Text to display" field.
39. Click "Yes".
40. Click "Insert link".

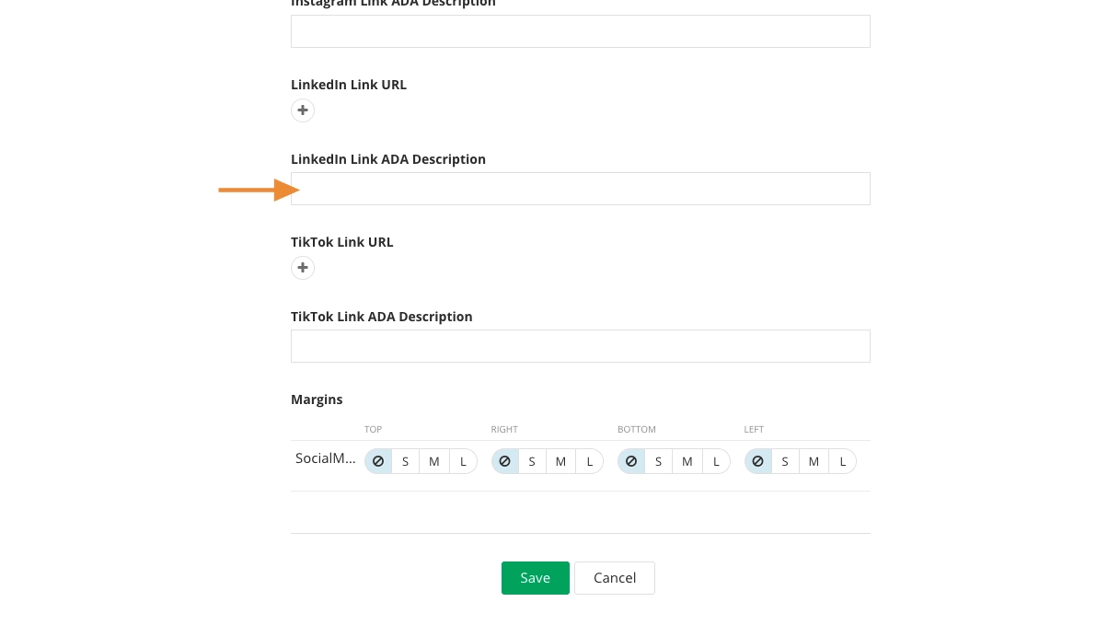
41. Fill in the ADA Title field.
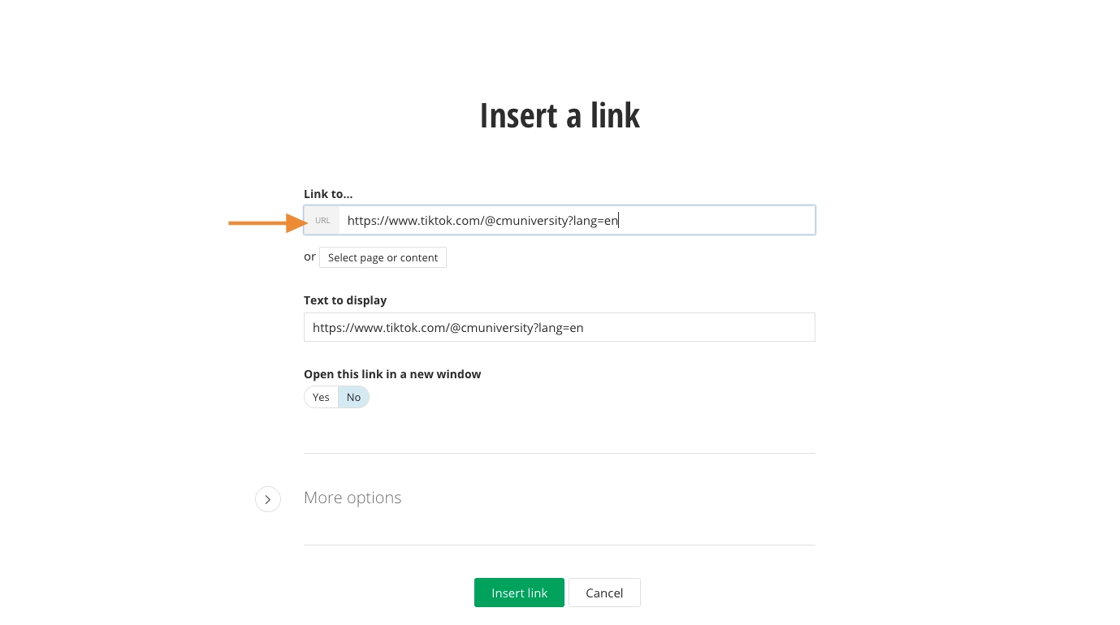
42. Switch to your TikTok account's tab and copy the URL.

43. Switch back to Sitefinity and click the "+".
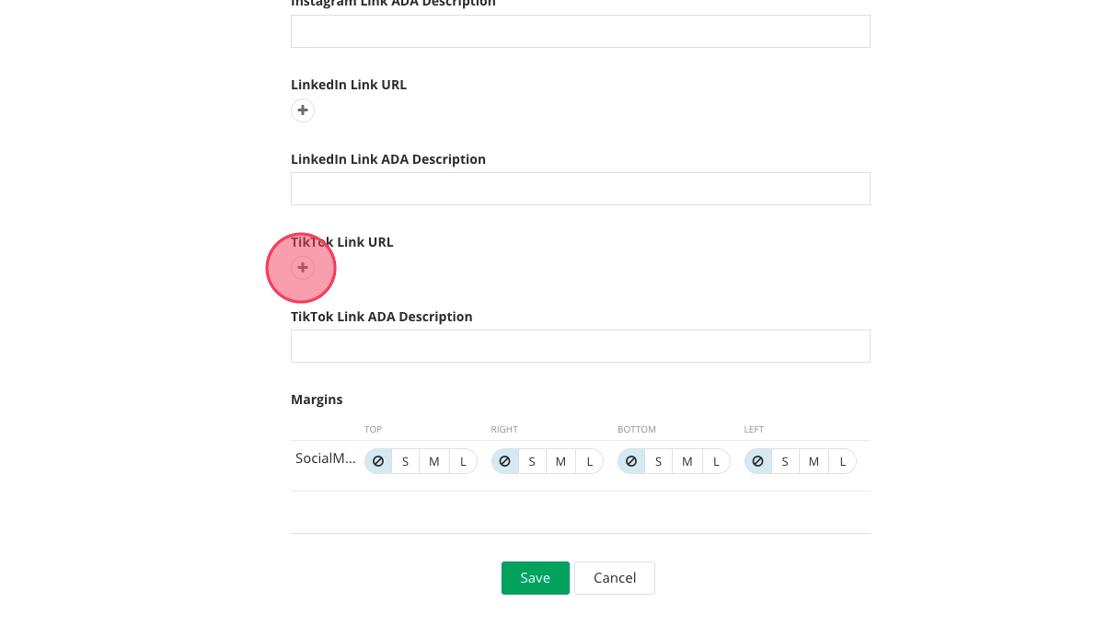
44. Paste the URL into the "Link to..." field.
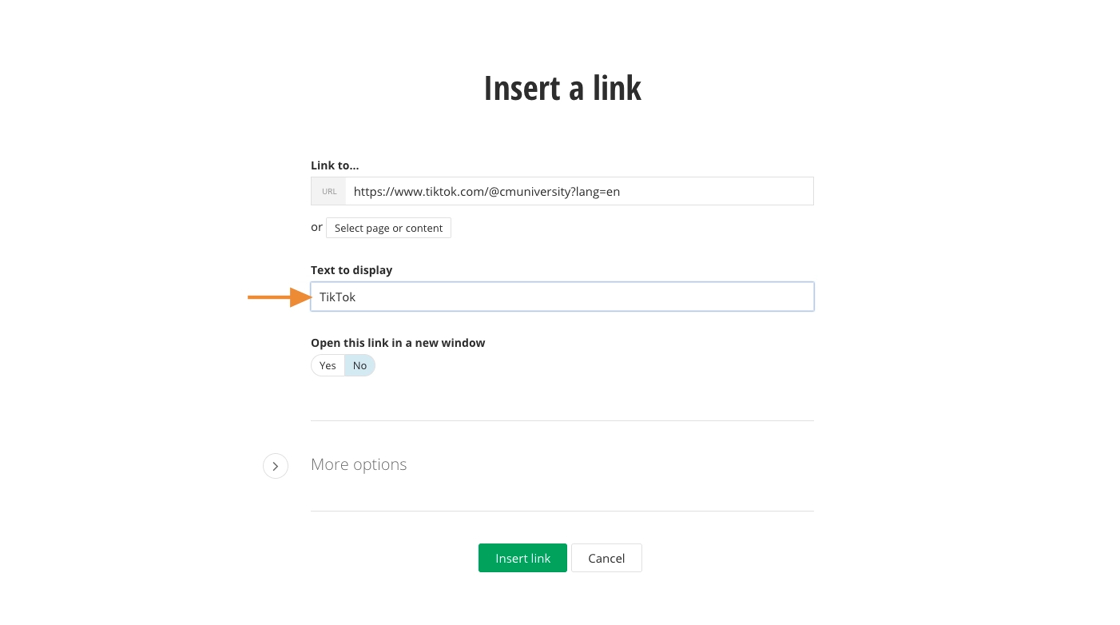
45. Type "TikTok" into the "Text to display" field.
46. Click "Yes".
47. Fill in the ADA Title field.
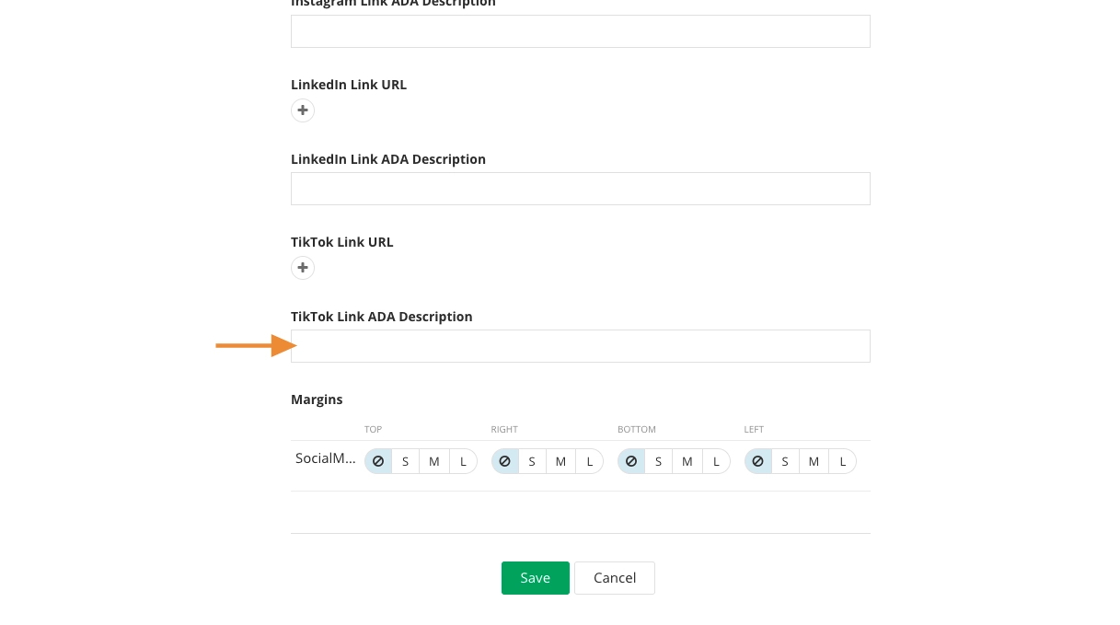
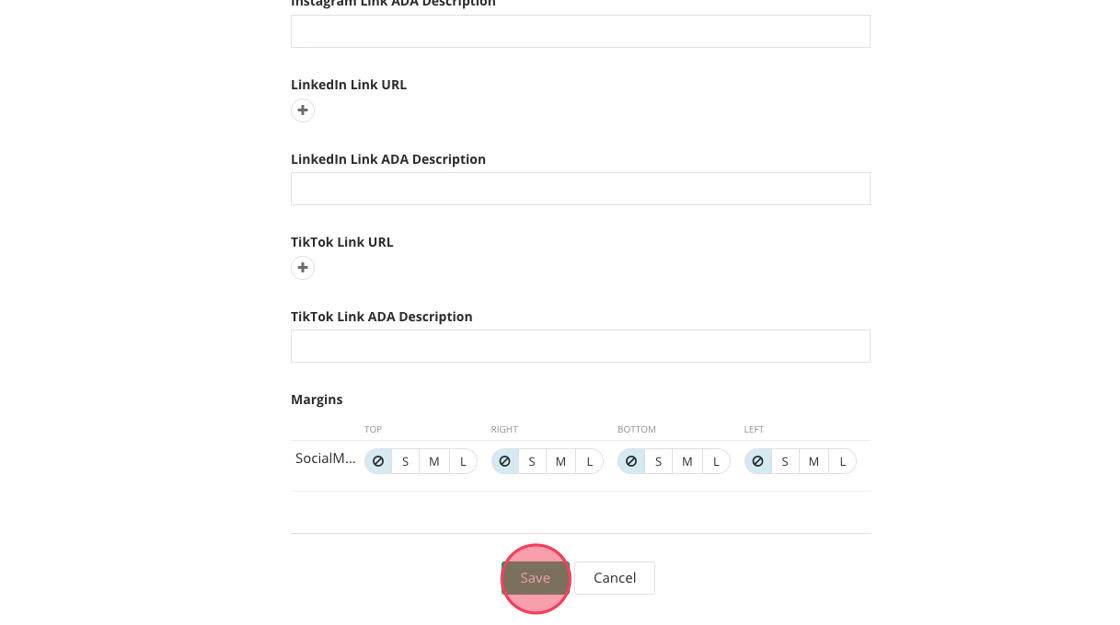
48. Click "Save".
Save and send
- If you'd like to continue working on this page, but need to save your progress, click Save as Draft.
- If you're finished making changes to the page, and the page is ready for review, click Send for Approval.
![]()